I played a long time with the idea of building my own arcade, but because of the lack of skills in dealing with wood, I kind of dropped it until December 2009. Bach then I got an early Christmas present. A free TV-Ideal arcade with Arkanoid 2 Jamma. Thanks to the snow chaos it took several long weeks until I finally was able to pick the arcade up.
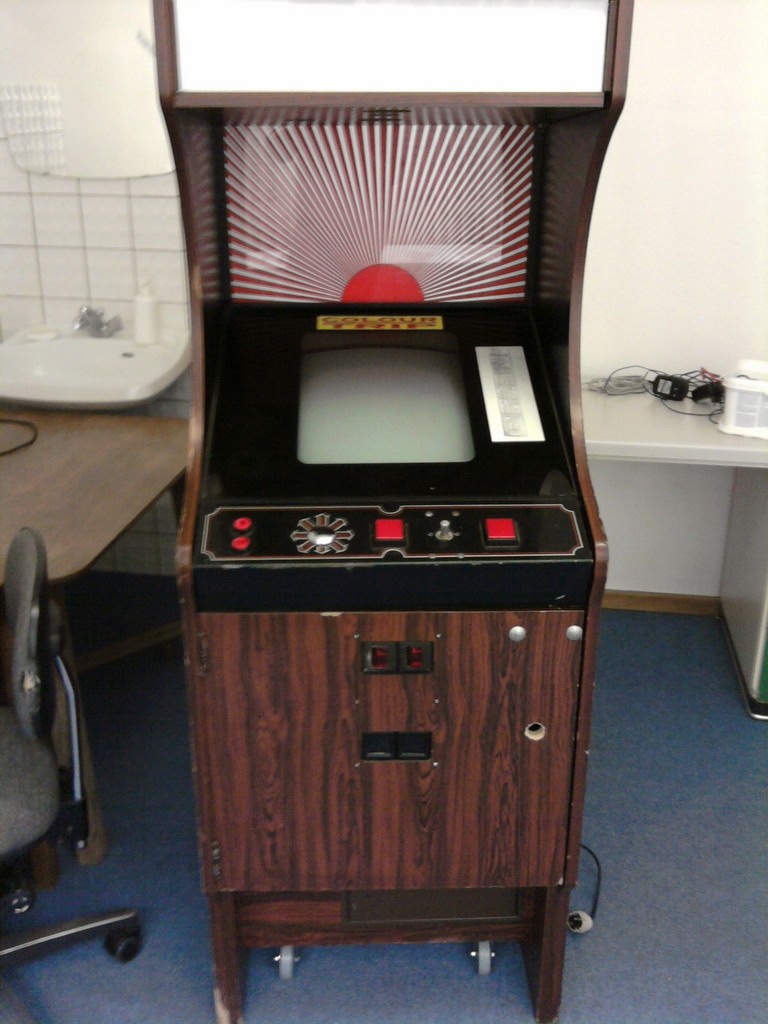

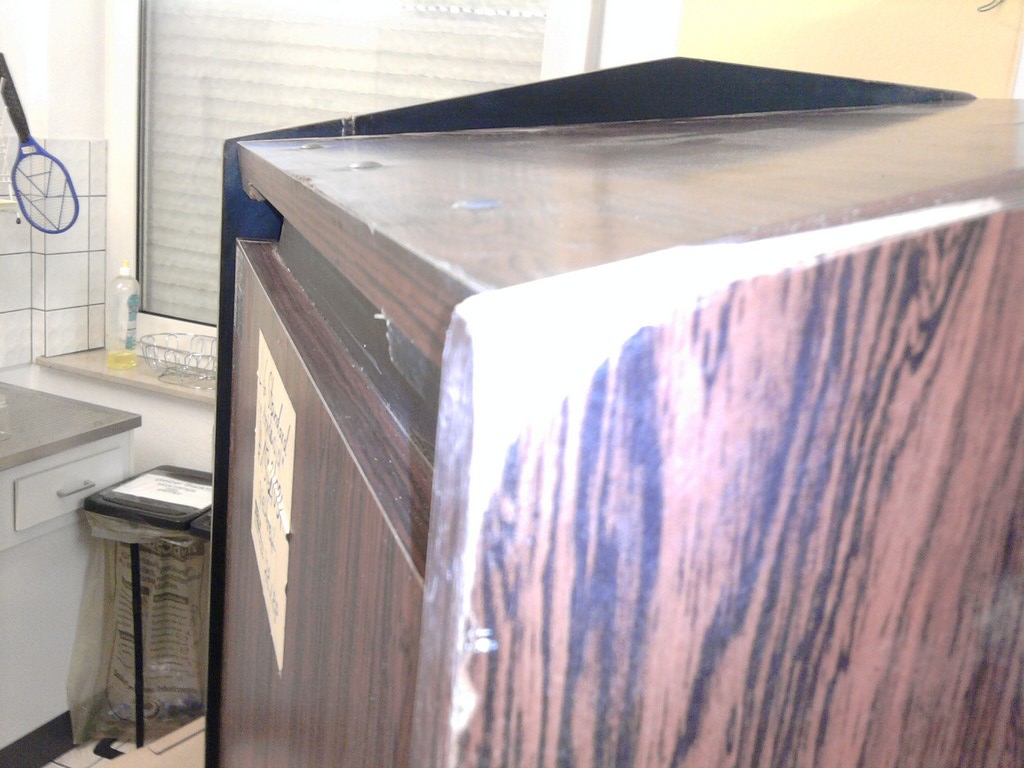
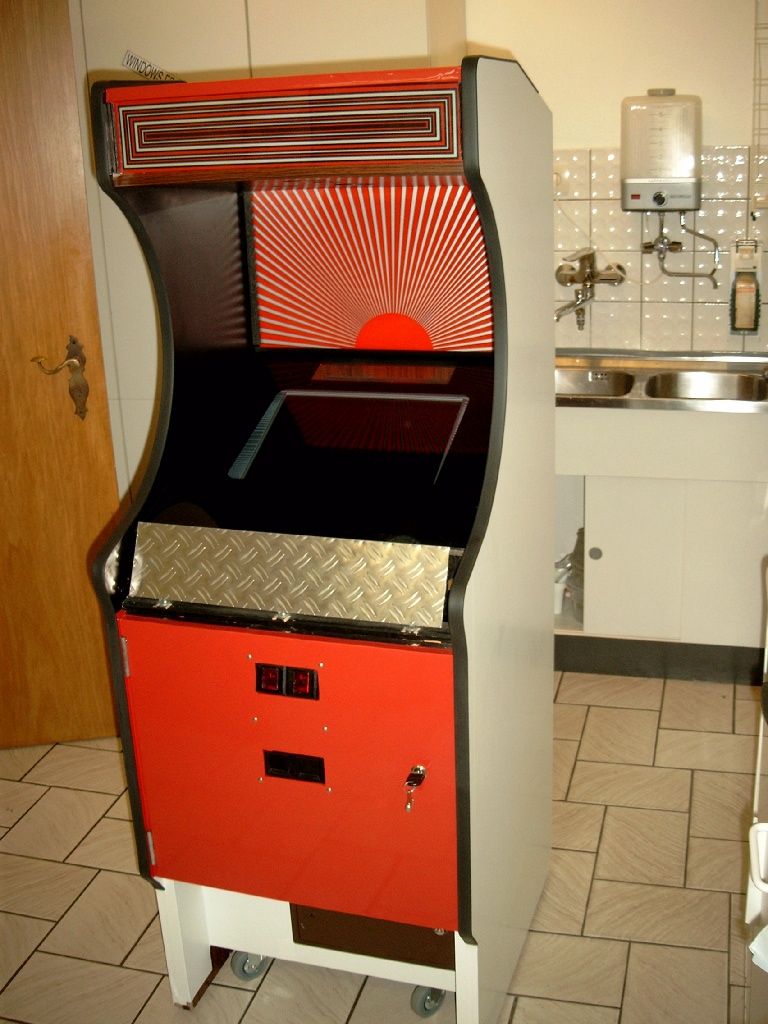
It's a huge and ugly box and in a quite bad shape, but a good thing to start with. Just keep in mind this wooden box is more than 22 years old.
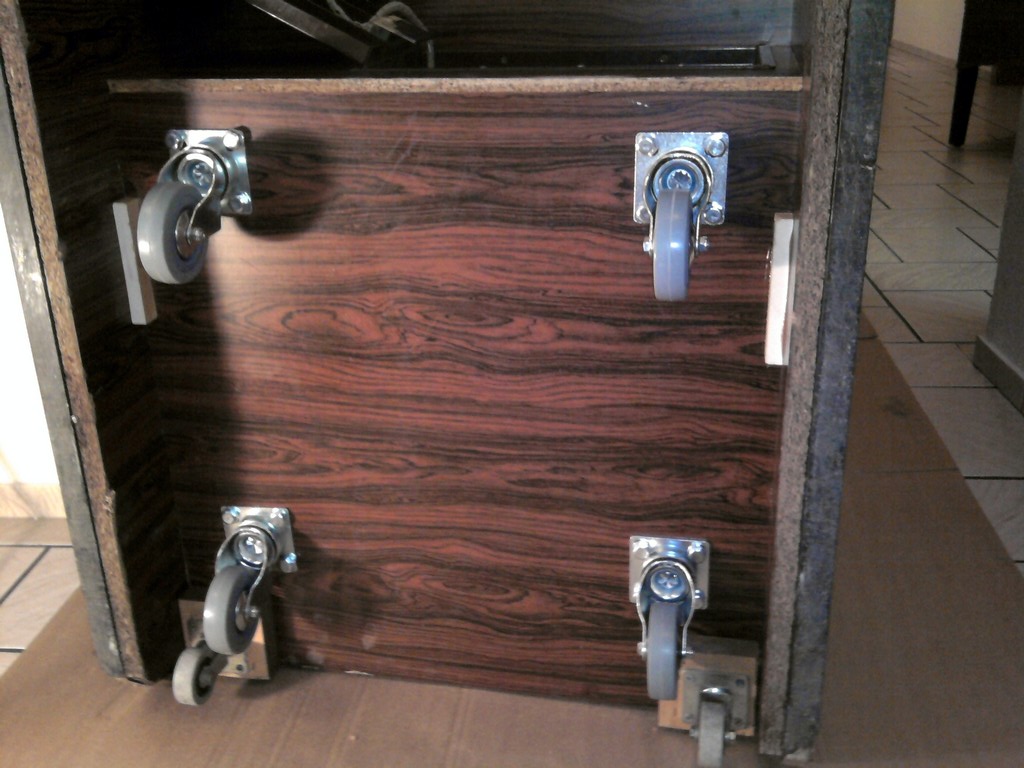
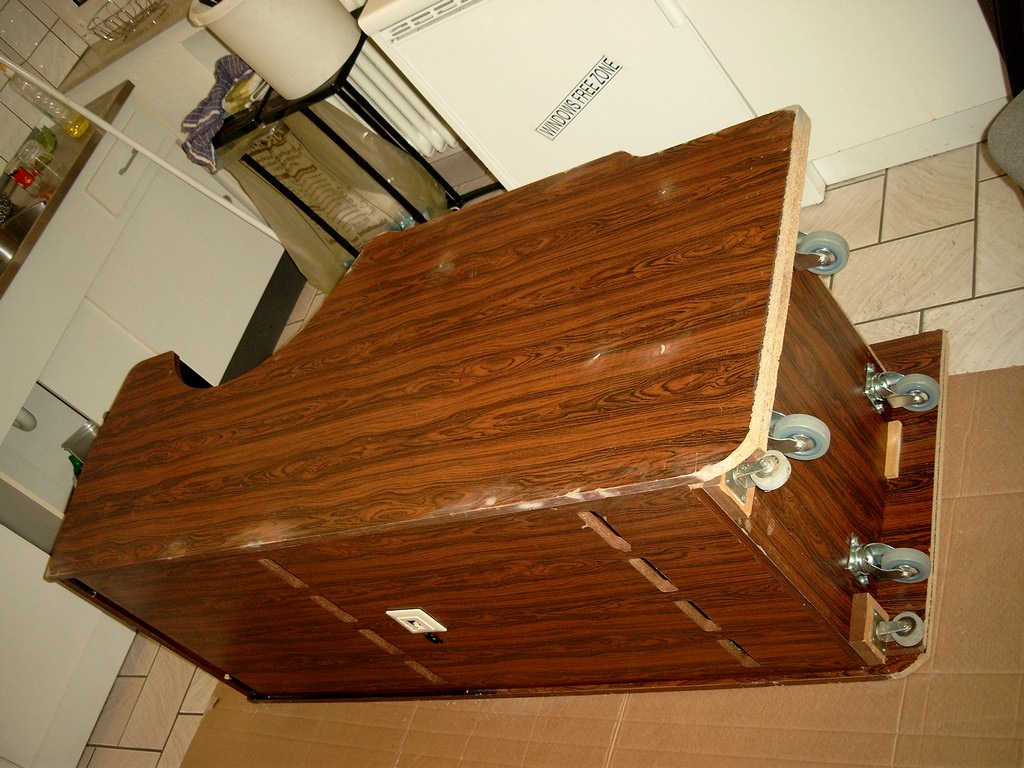
To make the colossus more easy to handle, I put it down right at the entrance and added wheels to make it easy to move it around. That is the reason the pictures above are actually made after adding the landing gear to move it into a room with better lighting than in the floor.
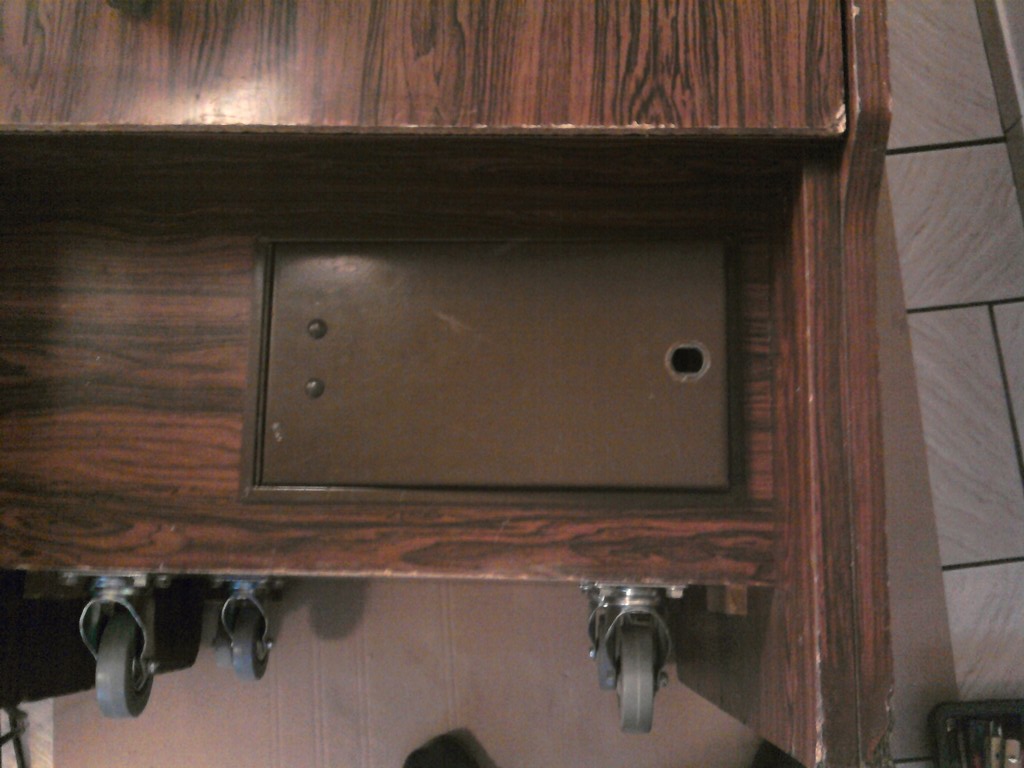
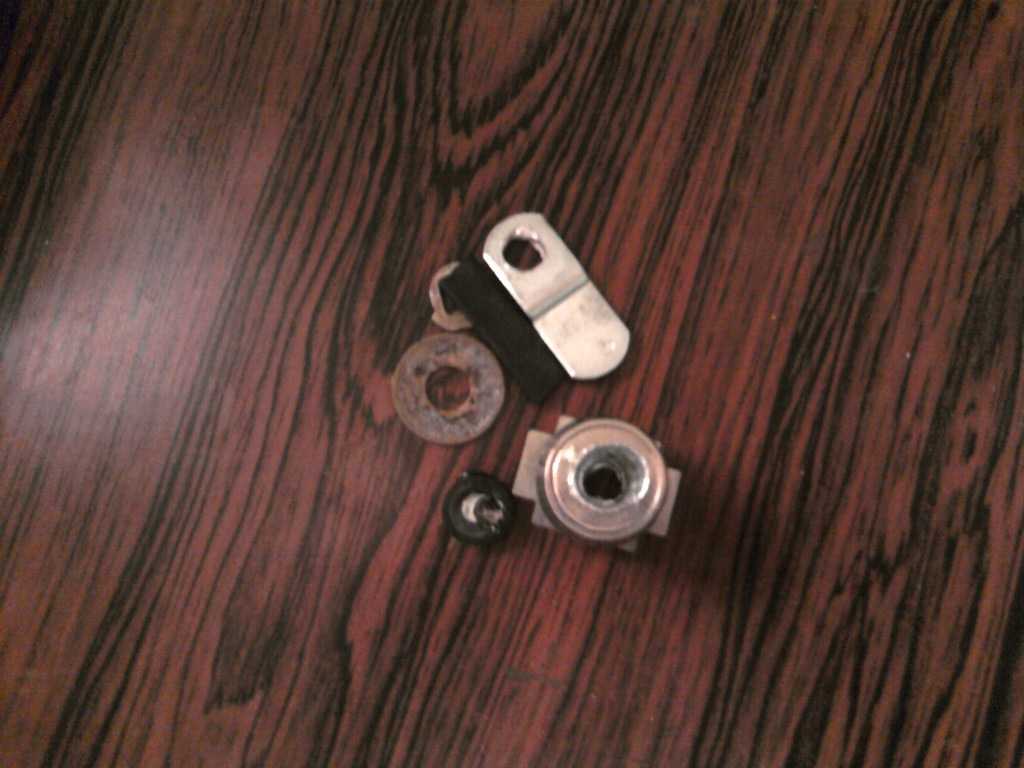
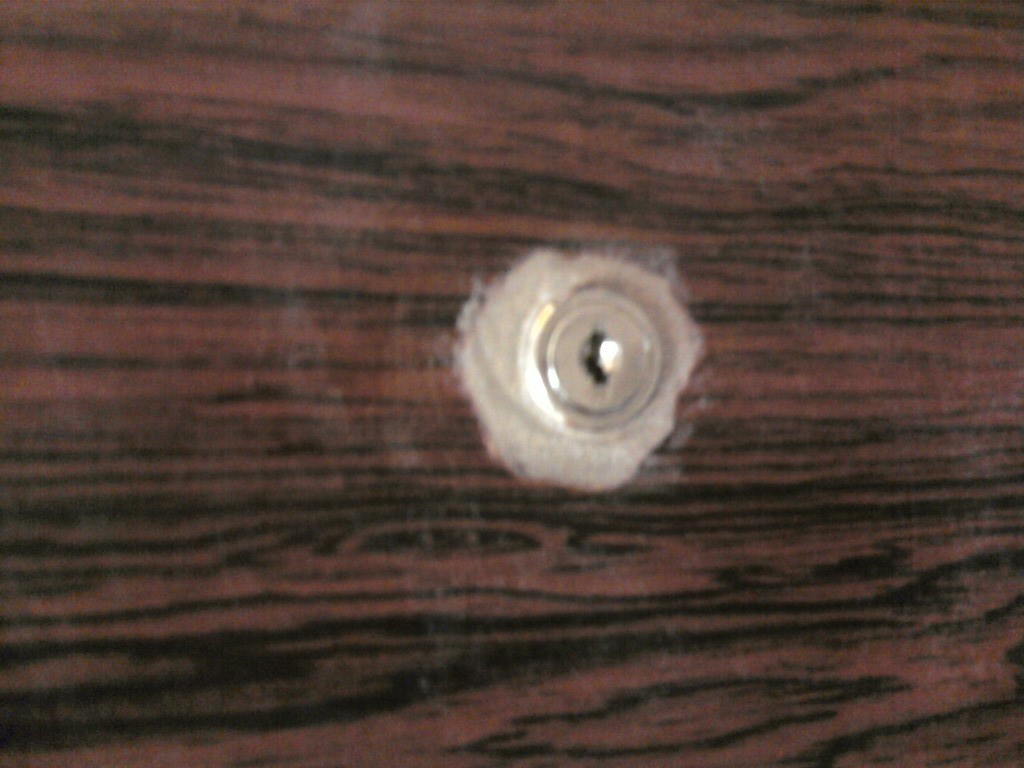
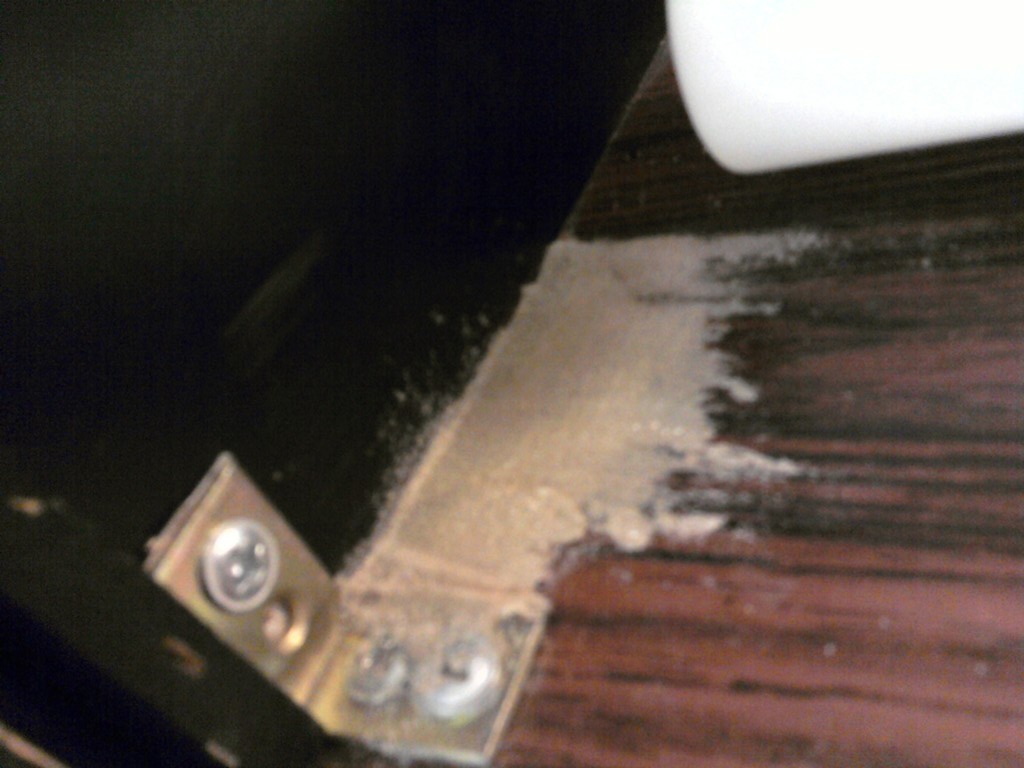
Since both keys where missing and the money box was locked, I needed to drill the lock open. Since the arcade was on the ground I did it right away. On the second image you can see what was left after I finished the lock.
A few days later I started the project for real by dismantling it.
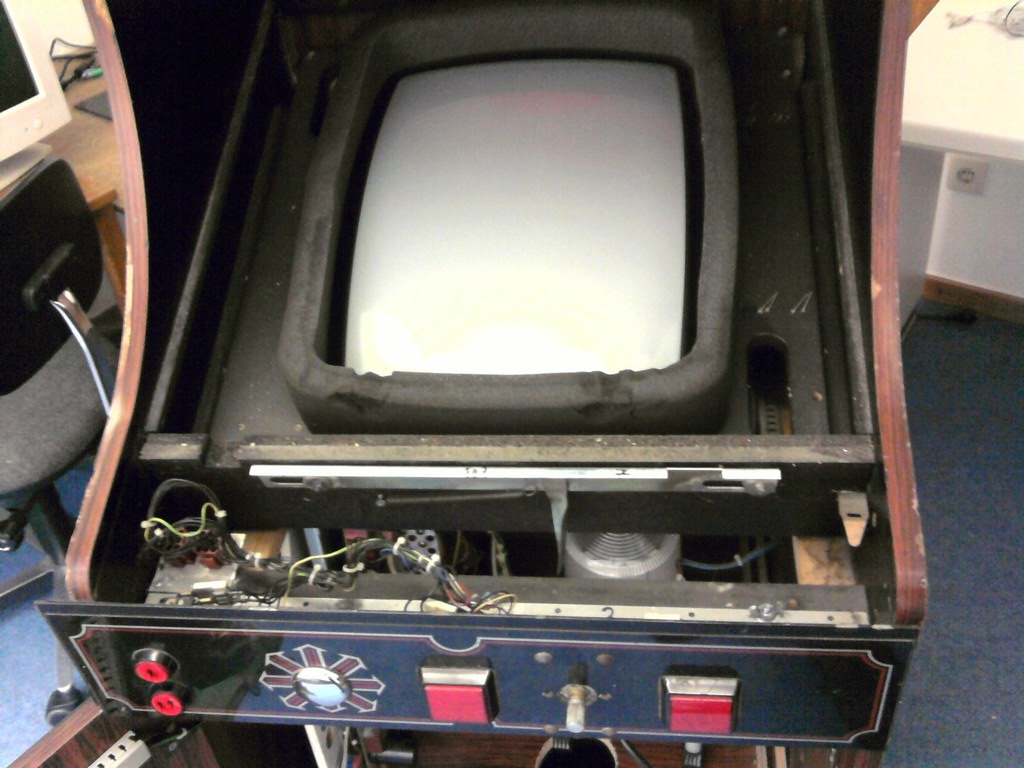
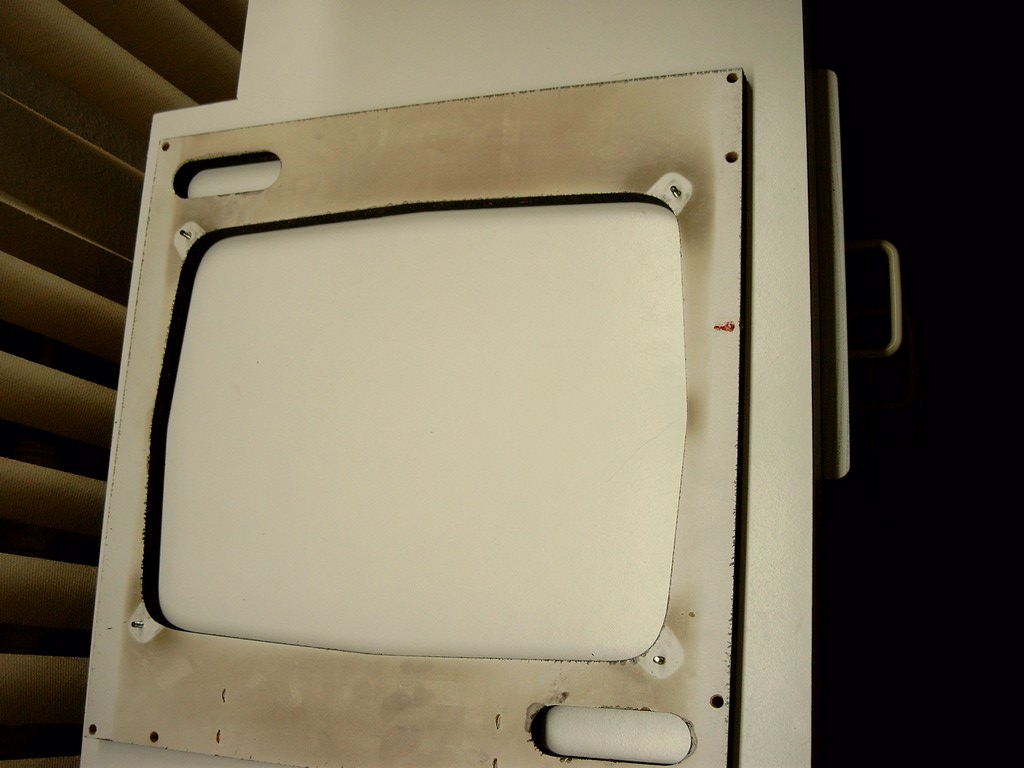
First the ugly damages stuff needed to be removed. The foam around the screen is the perfect example for ugly garbage. It felt like glue and destructed to small peaces by just touching it. Quite nasty stuff. I used a screw driver to pick it up and put it into the dumpster right away.
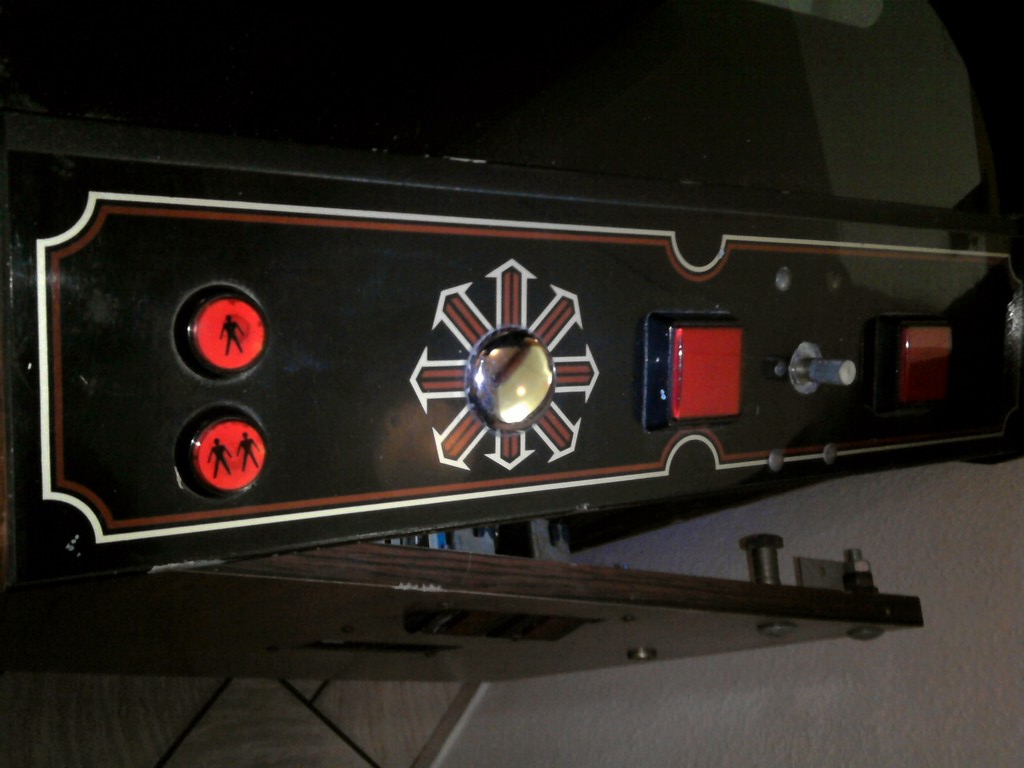
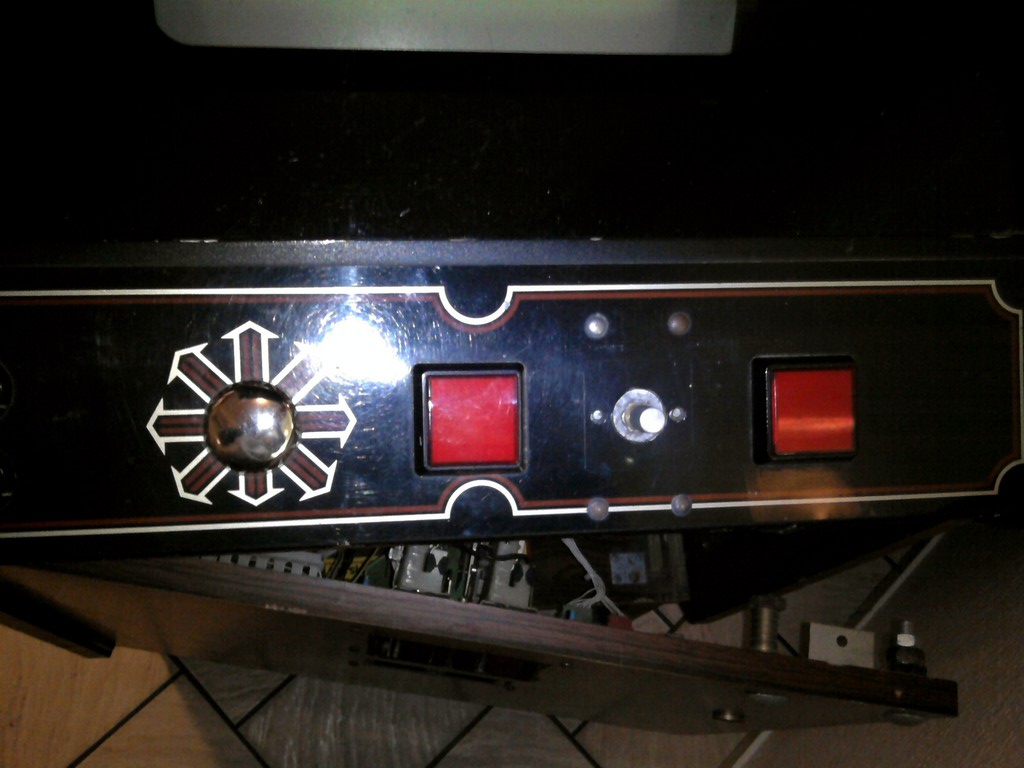
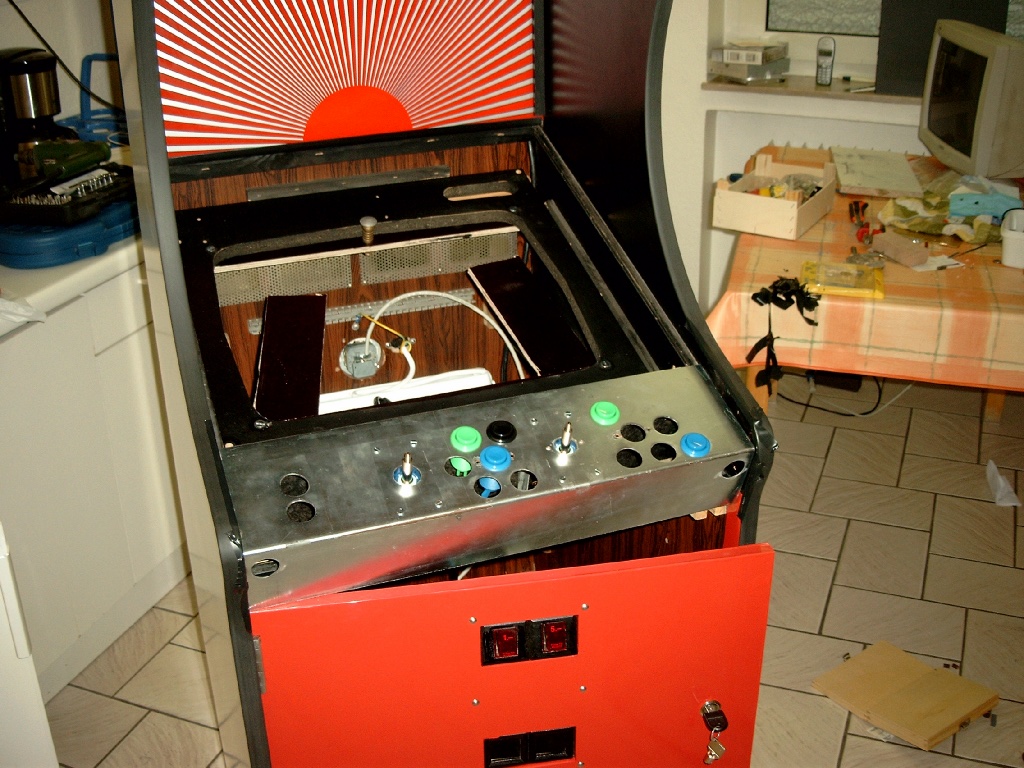
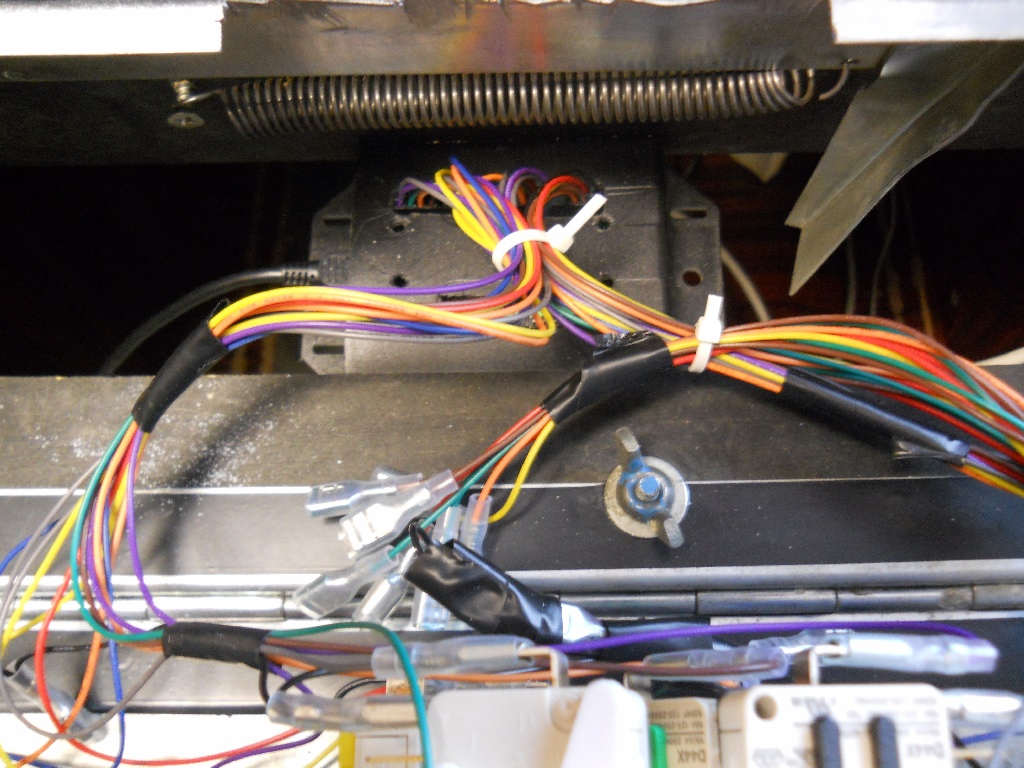
On the right side you can see the controls. The round metal thingy is a cover, as the TV-Ideal is a universal box, where you plug in a cartridge like in game consoles. Since Arkanoid is a single player game, there is no second game controller installed. There is just a spinner mounted at the right side, where usually player two would play. It's a simple button you can rotate endless. The easiest was to describe it is a single axis old fashion mouse using a ball to detect movement. The spinner has a flywheel and instead of a ball a rotating handle is mounted.
Other TV-Ideal arcade may be set up different. Two spinners or two joysticks. PacMan is not very playable with a spinner. This arcade never had a different game than Arkanoid 2.
While I talk about the game cartridge. Here it is:

I was asked a lot why I did not just refurnish the original design. The answer is easy. There is nothing to keep at all. The TV-Ideal is just a wooden box, which is also quite ugly. It is not an Arkanoid 2 arcade. It is an arcade where just an Arkanoid 2 cartridge was placed in. Even with PacMan or another popular game this would still be a wooden arcade box with a game inside.
If someone would to this with a "real" arcade I would personal tar and feather him. A real arcade with game related classic images should be refurnished at any cost and not be destroyed.
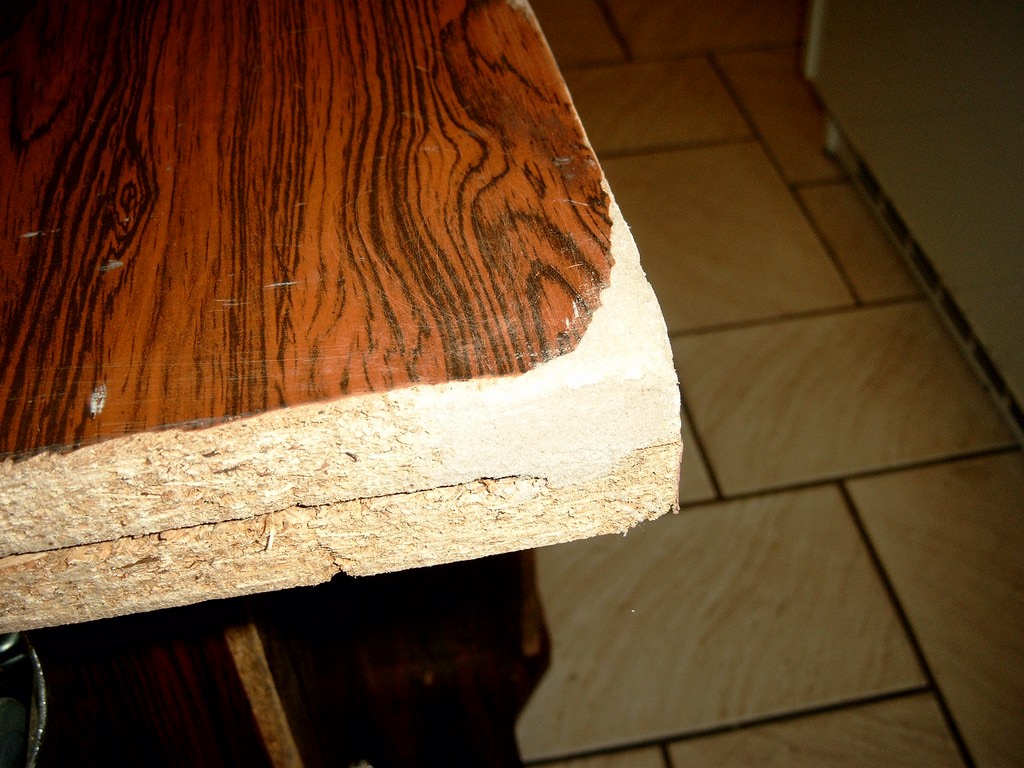
The case had loads of bumps, buckles and missing edges. It also was shaken during transportation, that the entire case was hold only by a few hundred wood cramps.
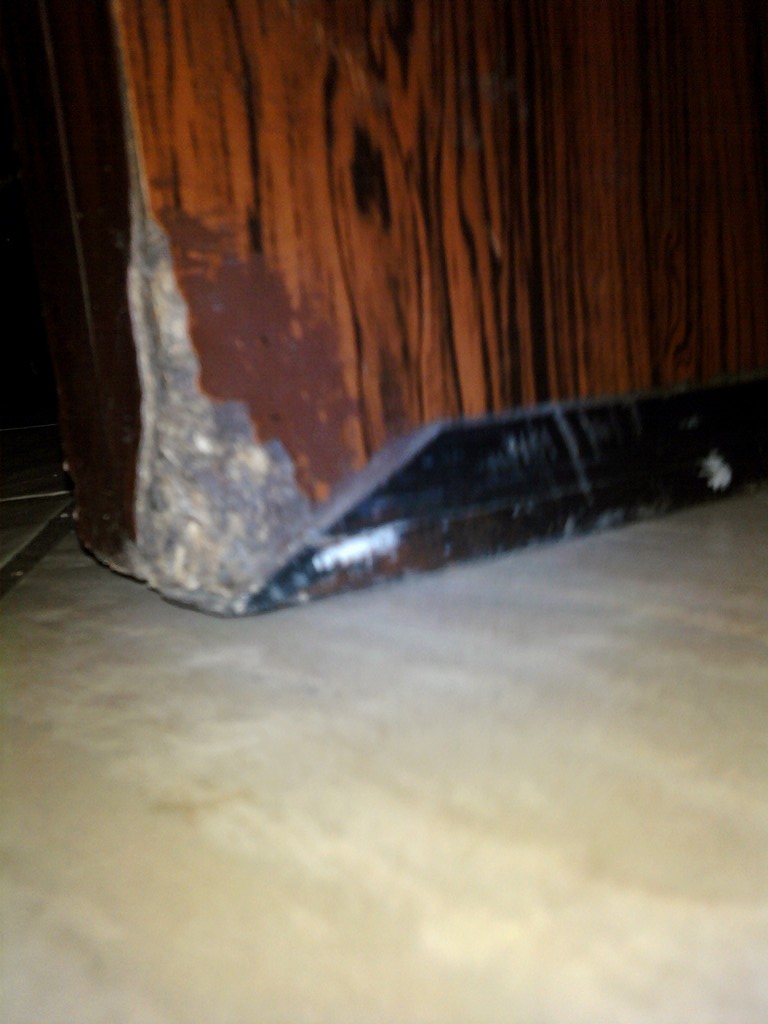
On the second image you can see the brighter part. That entire edge was missing and I remodeled it. I used "Molto Holzspachtel". On the right image you can see the untouched bottom of the arcade. The black stuff is the edge protection or what is left of it.
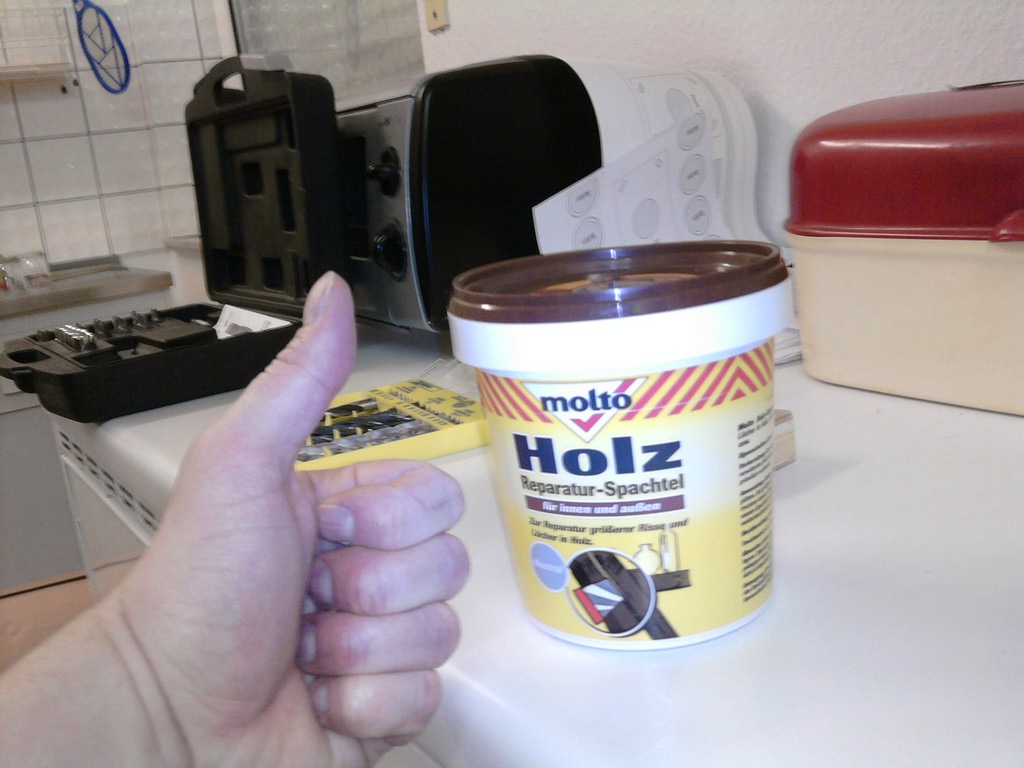
This wood filler is very nice. At first I was very skeptical. In its package I just found a blue ball which more or less looked like atomic waste. Touching it even more surprises the handsome wood worker. It feels like clay from kindergarden. Well, to be more specific like sand in a sandbox in the morning hours when the wet air of the night is still feel able. Then you learn it does not work like expected. You must push it in position not spread it. Once you got that you can use the material left to build some home without stones. The blue shining surface not really make you wonder anymore. There is no need to cover the ground unless you work on carpet. On stone floor you just pick up the peaces of plutonium when it is try. Depending on the amount of material you put onto the surface you can continue after around two hours. Thumbs up!
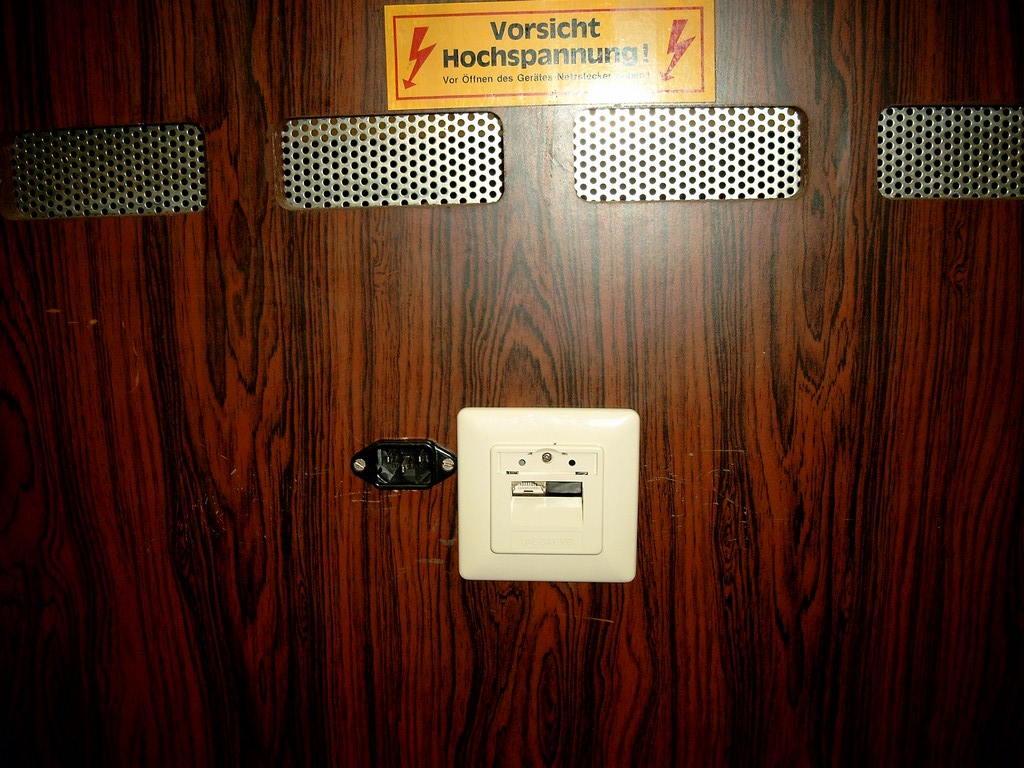
Here you can see the refurnished main door with the new lock and the lock separate. All the grey spots you can see are filled parts. On the third picture you can see the damage of the original wooden plates where reworked. As you can see it's still required to smooth down the surface. The fourth image shows a reworked bottom edge.

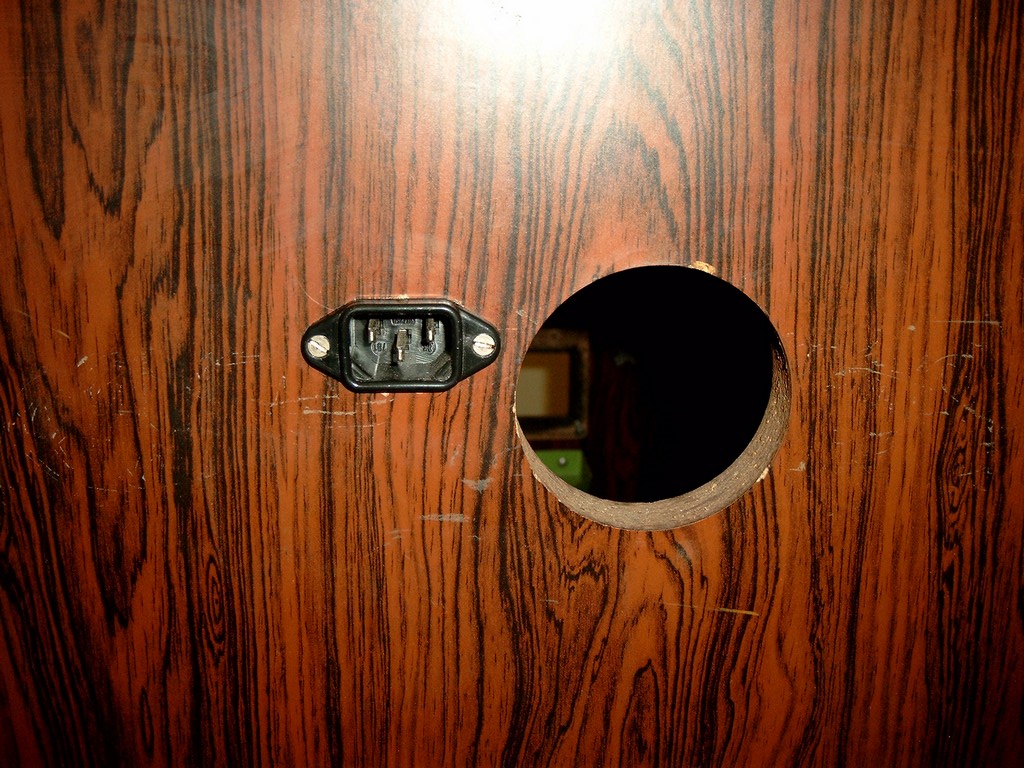
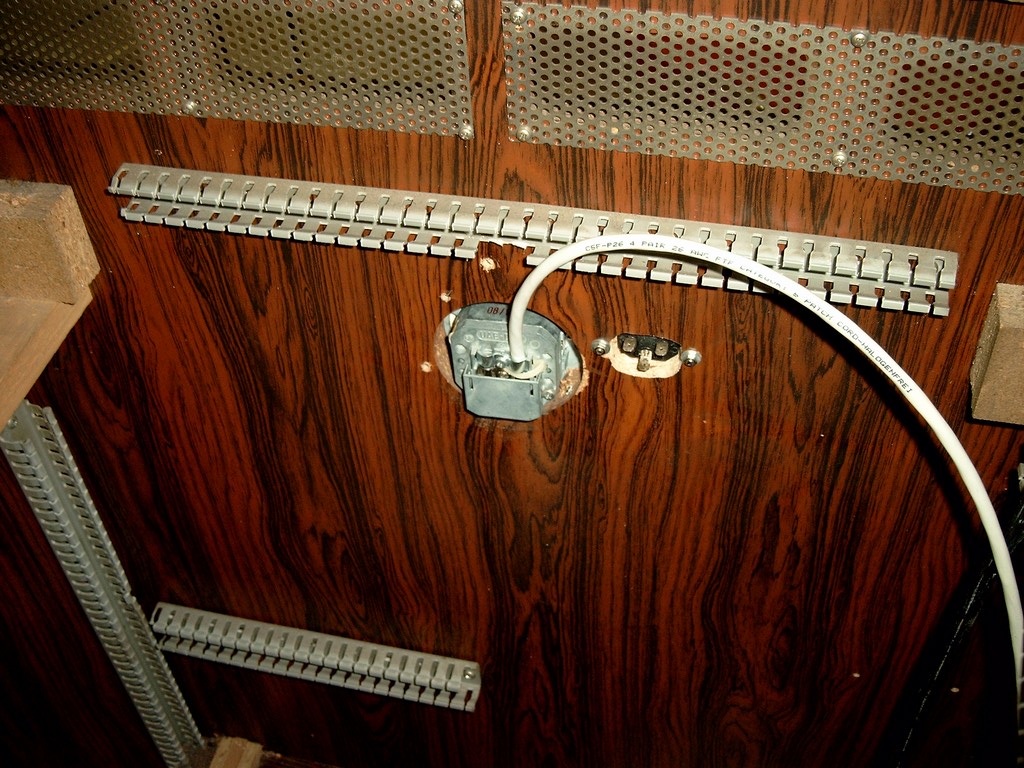
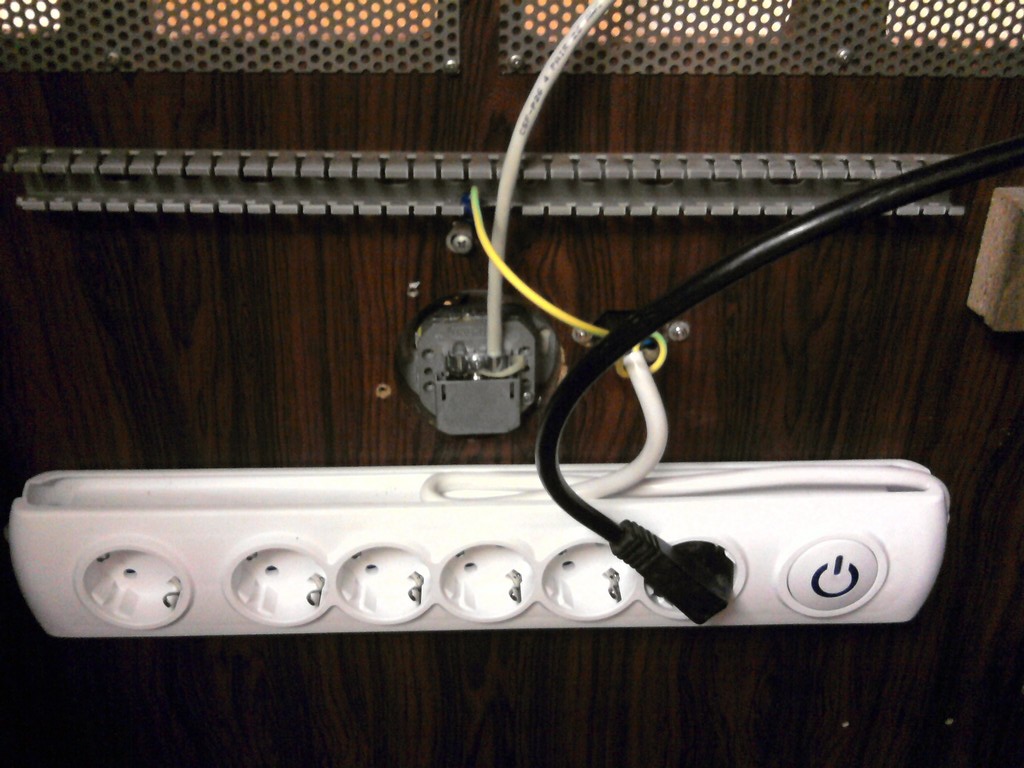
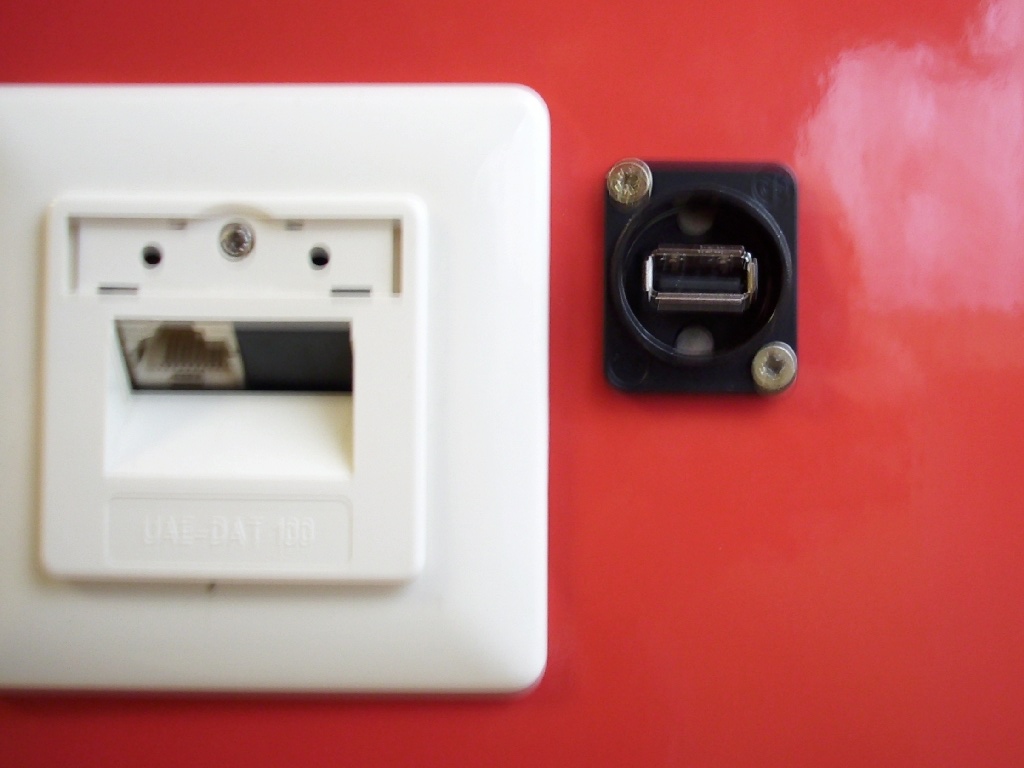
In the meantime we have a power connector and thanks to Axel Knabe a RJ-45 network connector. The cable ducts you can see is from the original installation. I will keep some, but most of them are obsolete.
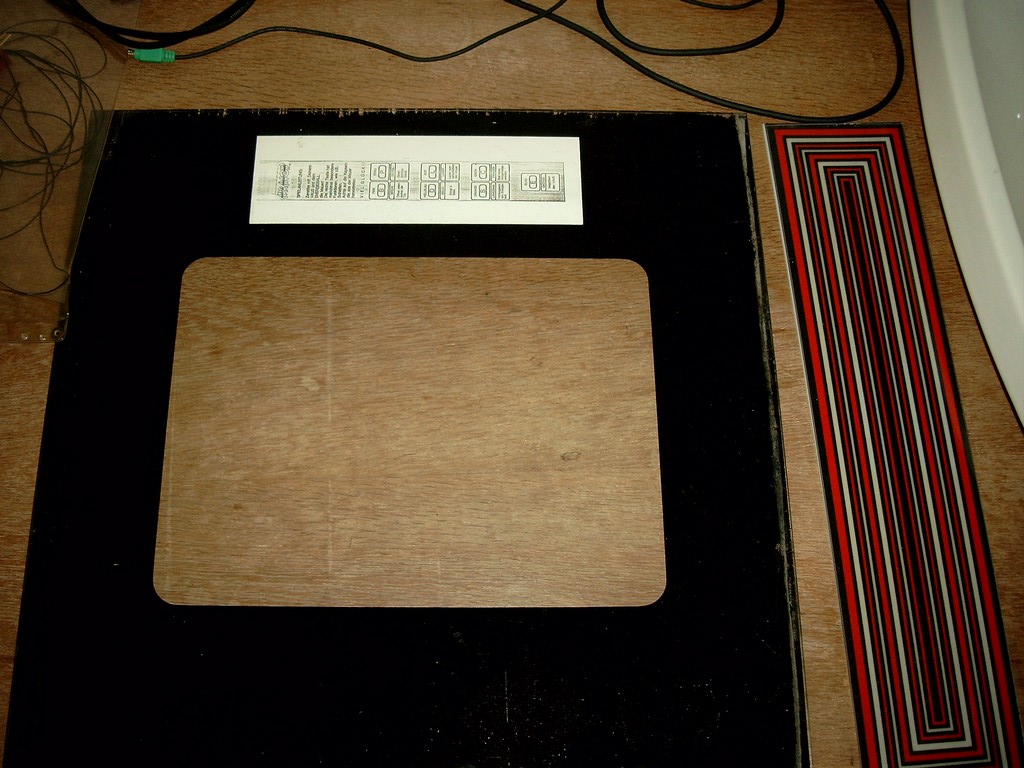
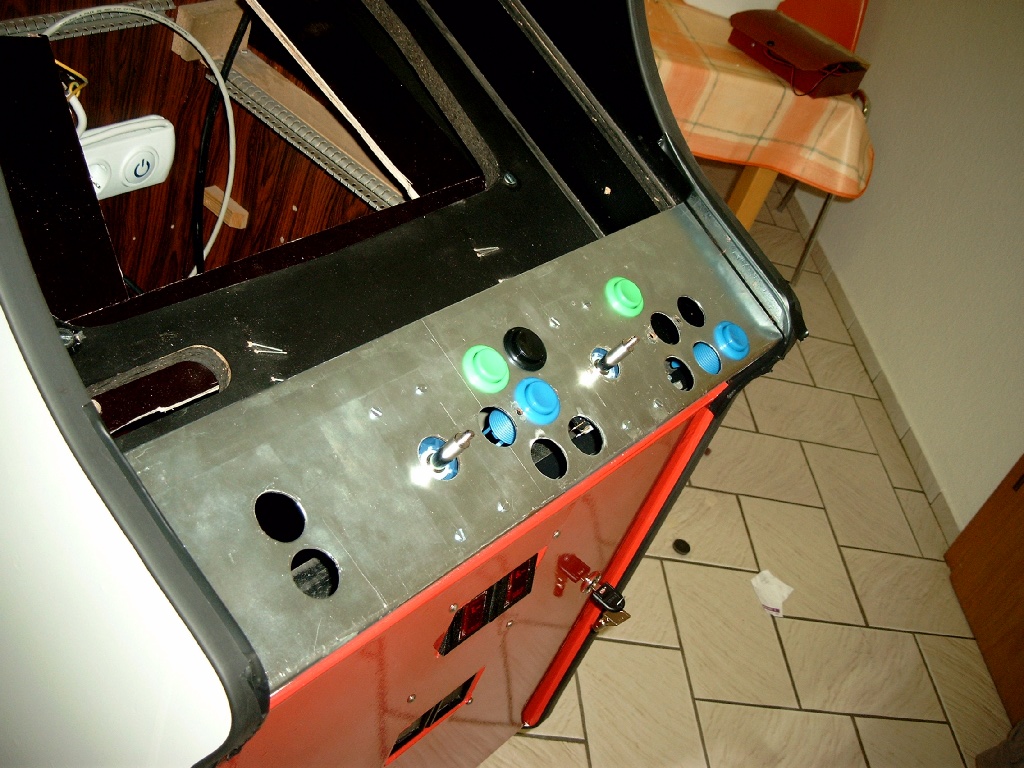
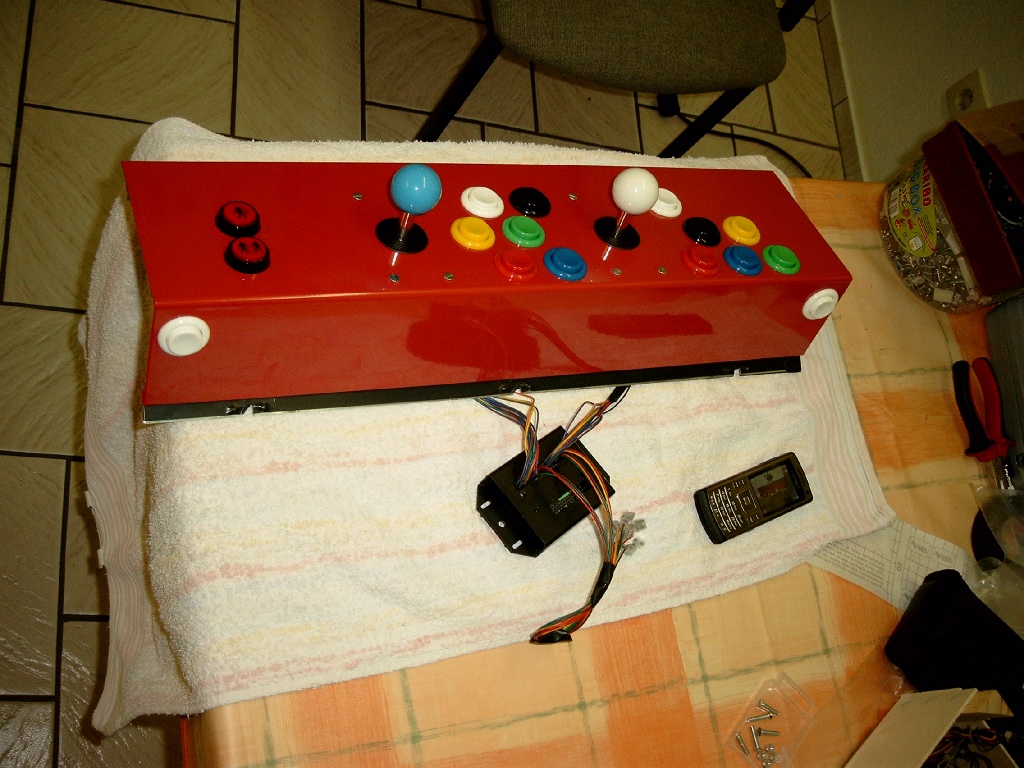
It is about time to take a look onto the control panel. The original design just looks dusty and broken. One joystick per player and only one button is not what I have in mind.
First we need to rip of all the glue, plexiglas, paint and transparent plastic cover. The result is quite nice. I used the mount plates from the joysticks to get their dimensions. The black duct tape marks the positions I cannot place any buttons, because of the mount and stabilizer brackets on the back side. Small paper buttons allowed me to find out the proper placement. There was no way to have an identical layout for both players. It is also important that the buttons of player one are not in range of the joystick of player, so both can play without getting disturbed by each other.
Finally I used a pencil and dividers to pin point the exact position of each button. I drilled a small hole as a mark for the final process on each button location. I covered joystick and mounting holes to avoid them being drilled by accident. Since I am not able to drill 28mm holes into 2mm steel I will ask some friends for help.

While waiting on the controls I did more work on the arcade itself. I removed labels and cleaned removed parts like the coin checker. The crappy marquee lamp got replaced by a new one. The Power connector got wired.
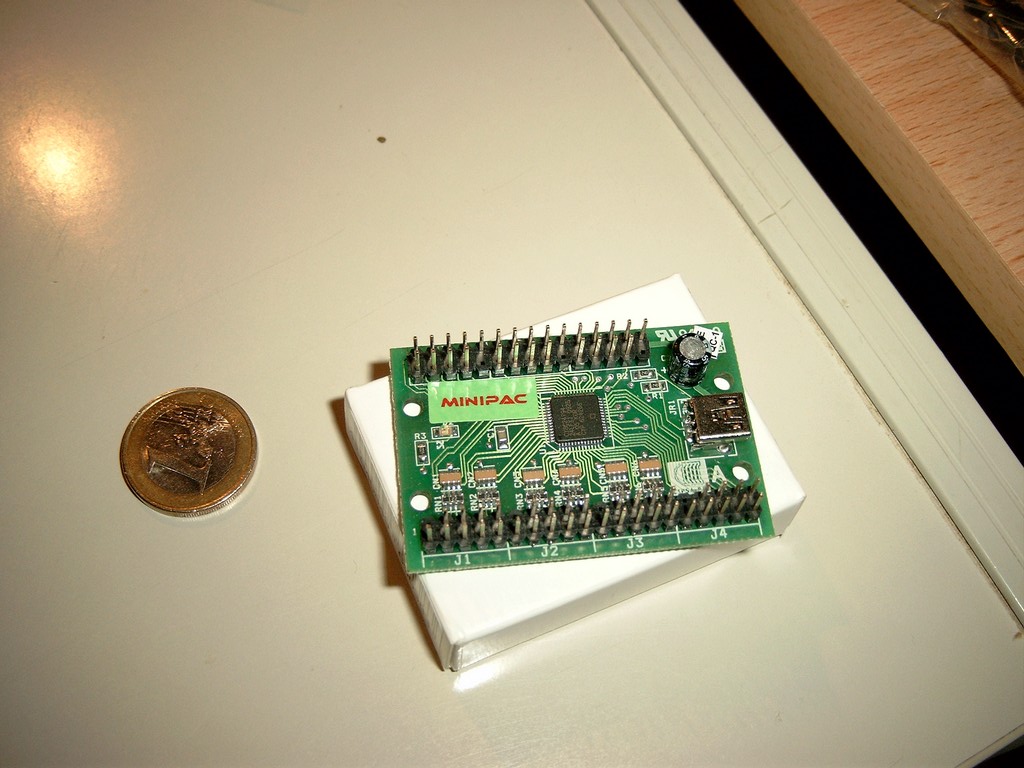
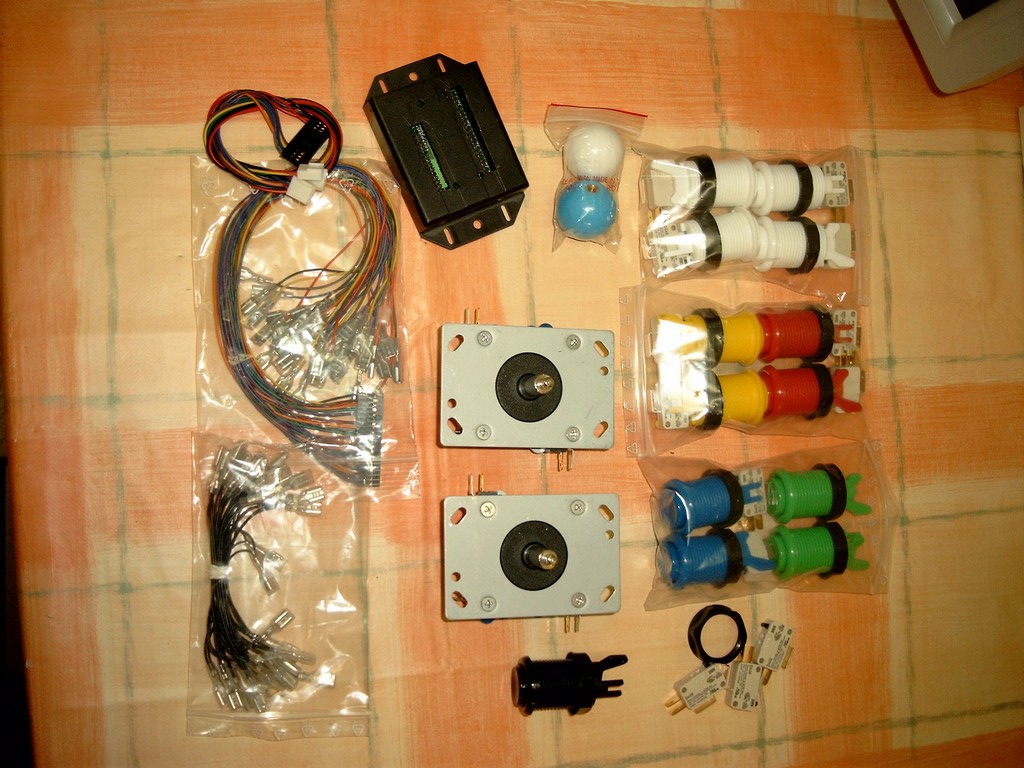
The online order of the controls was done quite fast. The MiniPac is the heart. He is connecting the push buttons with the usb port of the computer. The wires are delivered ready to use for a quite fair price. For the PC the MiniPac looks like a HID device. So basically each push button and joystick is transfered into a keyboard push. It is possible to reprogramm any push button to any keyboard key. Quite handy: The MiniPac came preconfigured for Mame. I just need to make some small changes for the menu handling. On the fourth image you can see that I placed the MiniPac into an old DiSEqC box which was waiting around 10 years for its final destination.
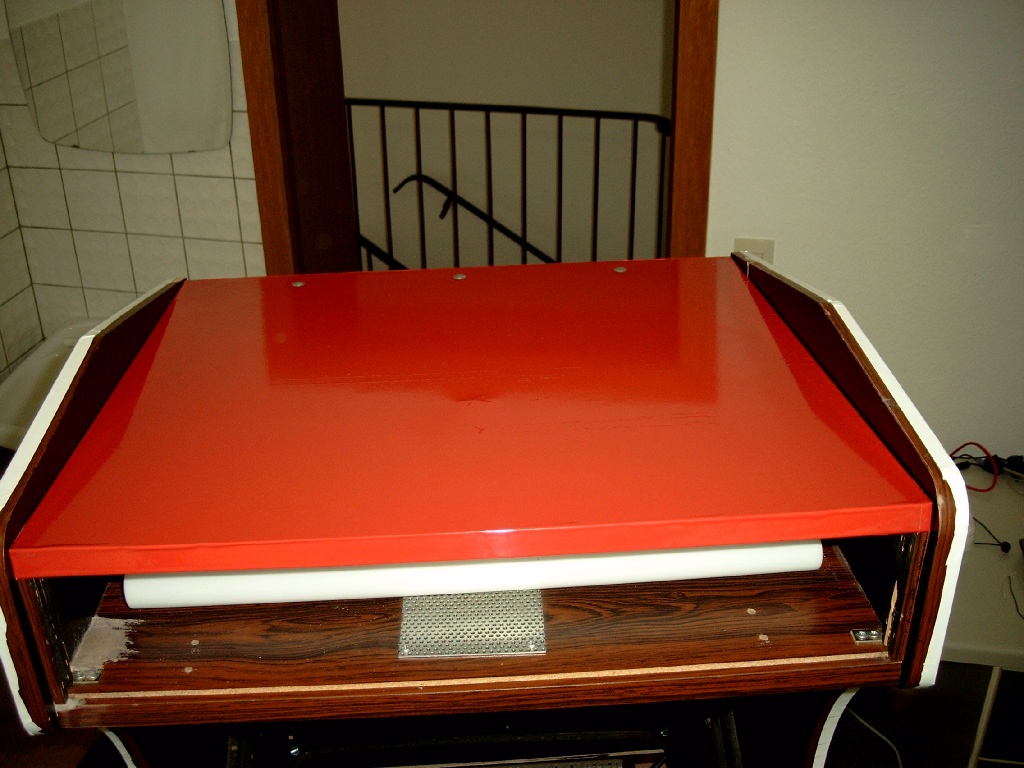
The Bezel required some work. It got cleaned and repainted where needed. Around 20 years old dust found it way to my sink.
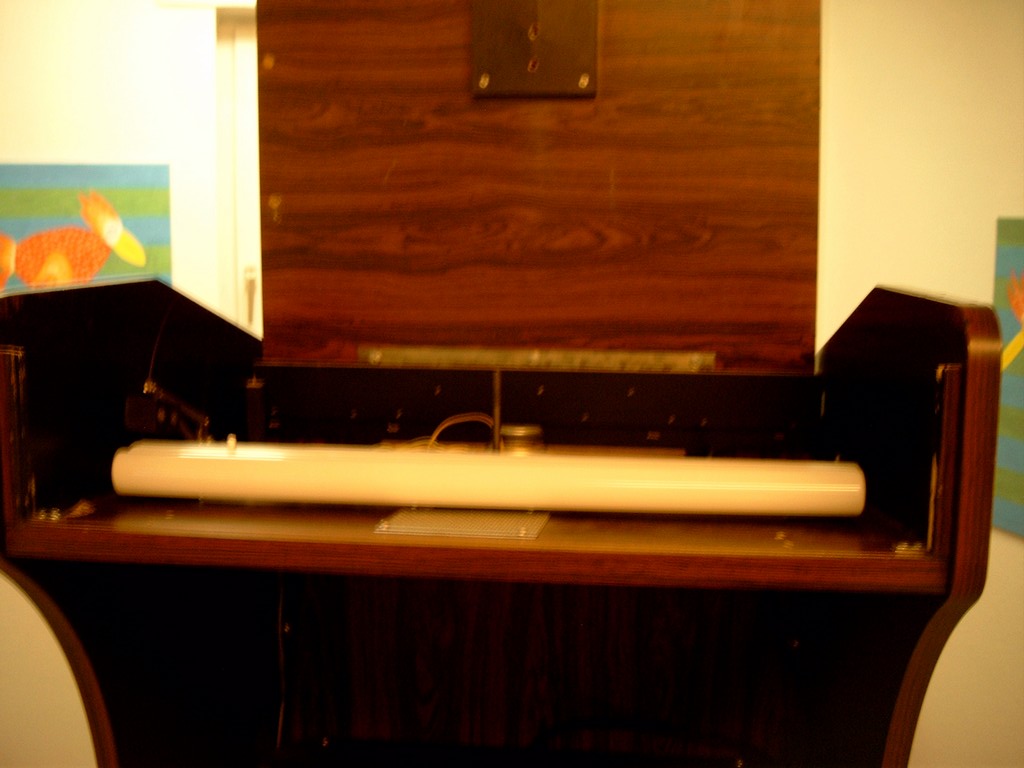
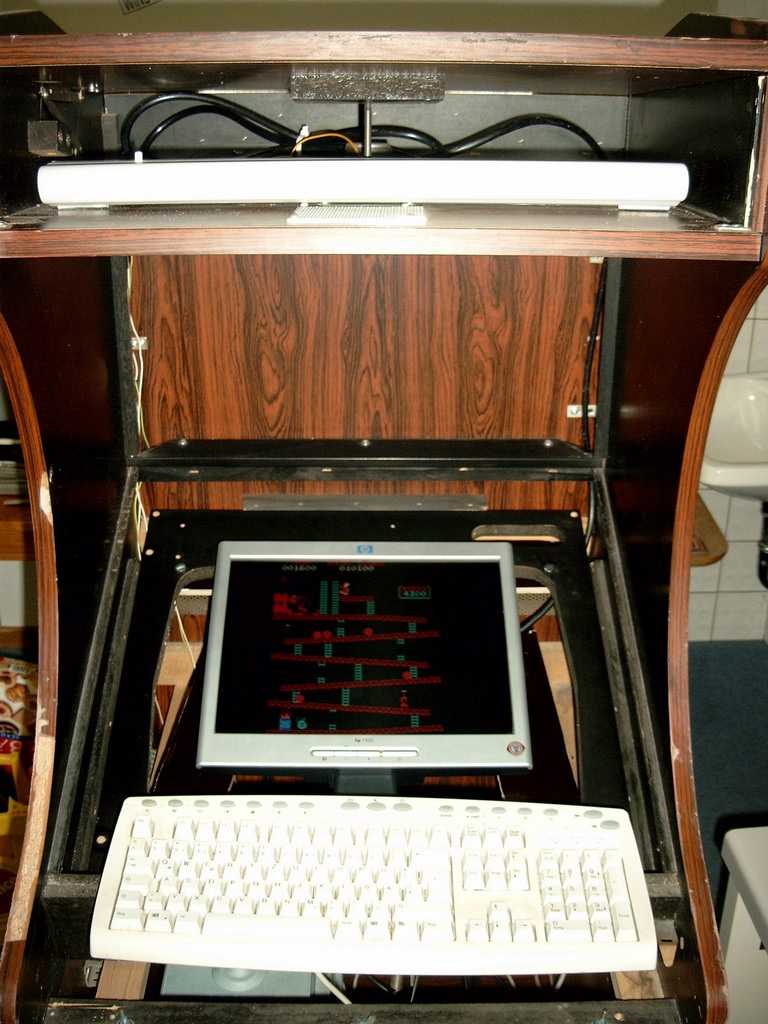
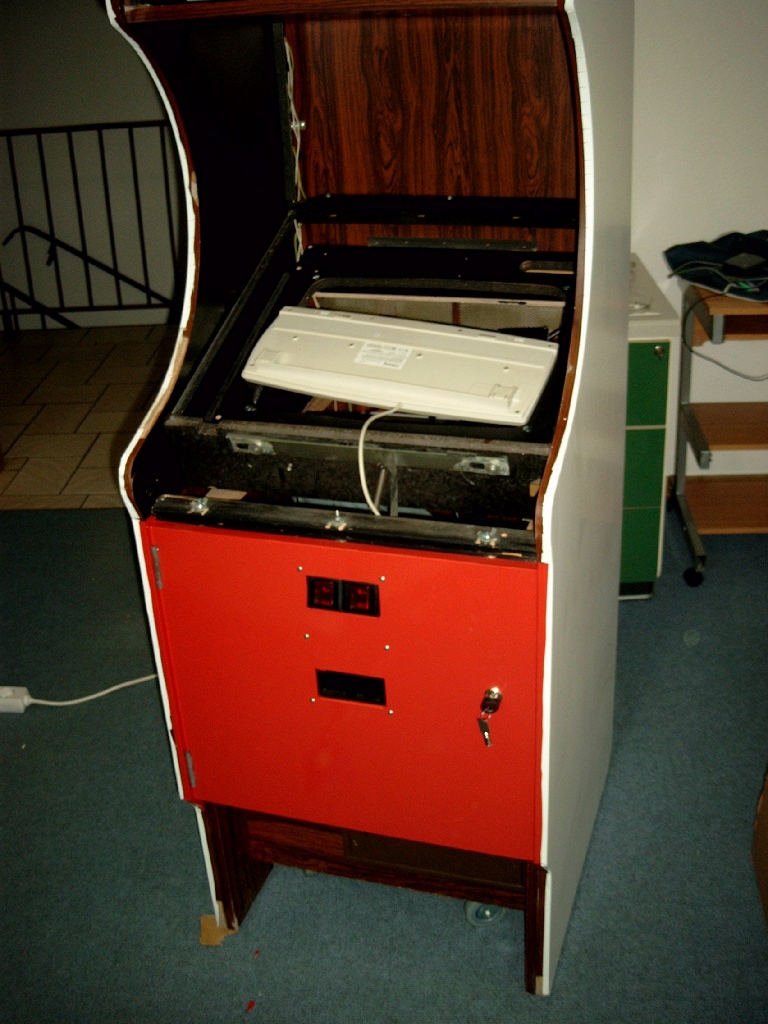
Same for the display mount. The picture shows the dust. No more words needed. Since I do not have the final display for the arcade I recycled some old mounting holes and attached black wood bars to it. That is where the display will simply be placed on. A little luck and it is possible to keep this cool and easy display mount along with the final monitor.
This mount cannot be used for transport, but as long as the box is using its own wheels, there wont be any problem. The computer inside would bounce around, too.

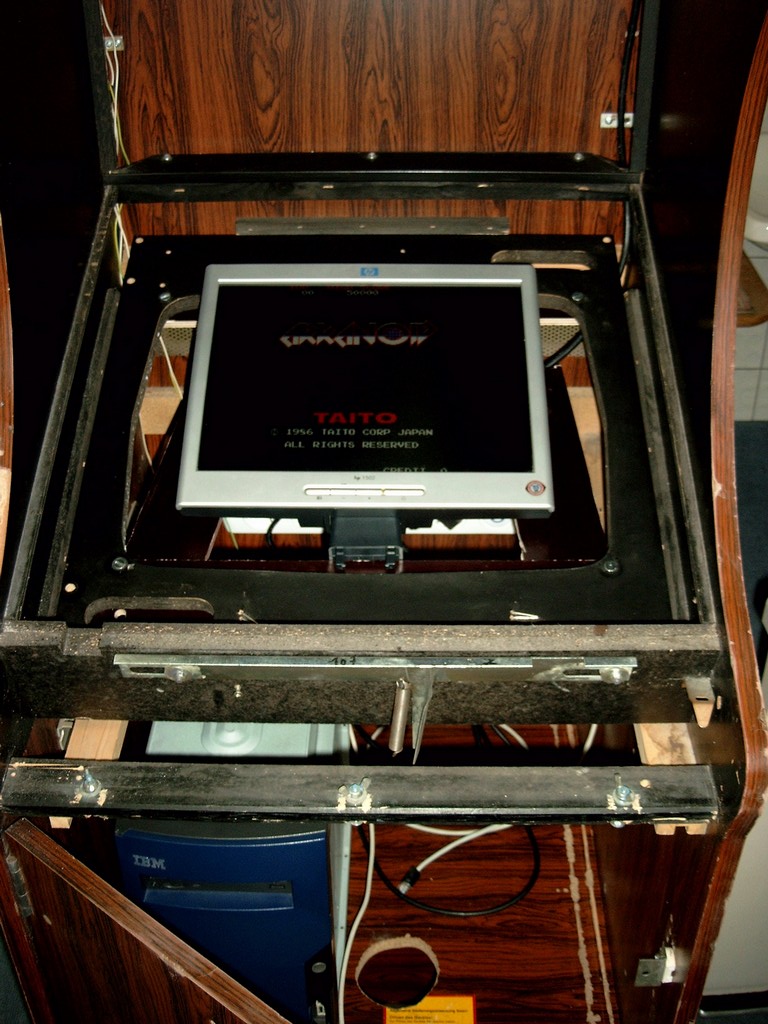
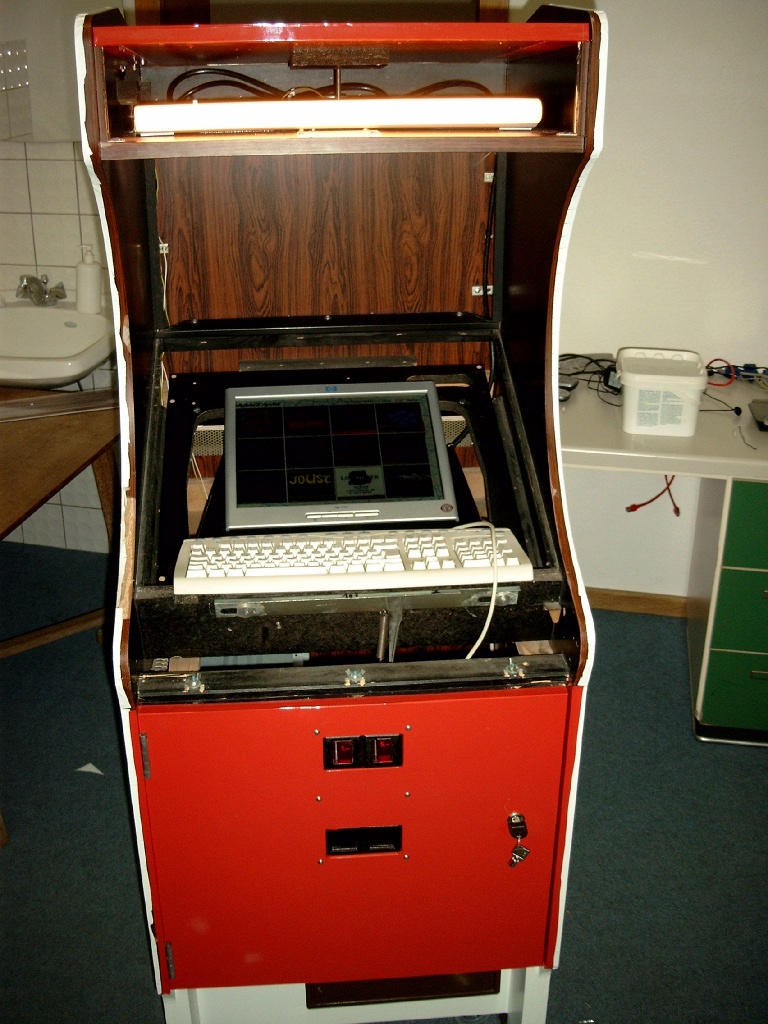
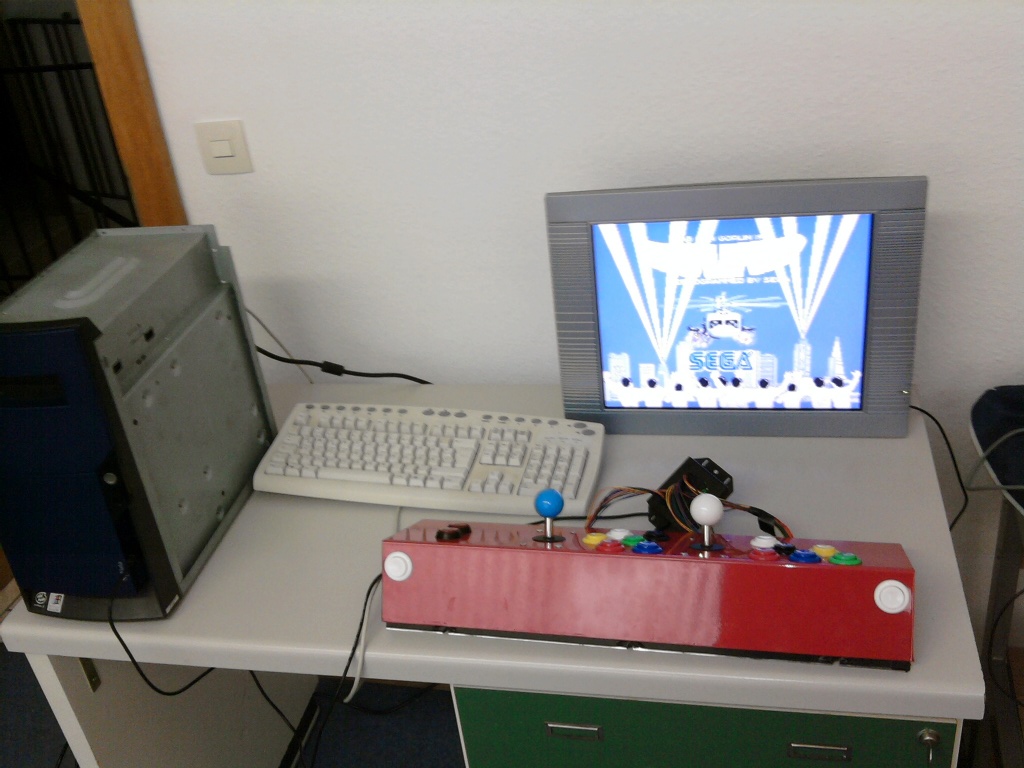
To avoid getting bored, the first game at the arcade. Yeah, it's not 100% authentic yet, but it gave me a basic feeling about doing it right and it is the best I could do at that state of progress. Arkanoid is home again.
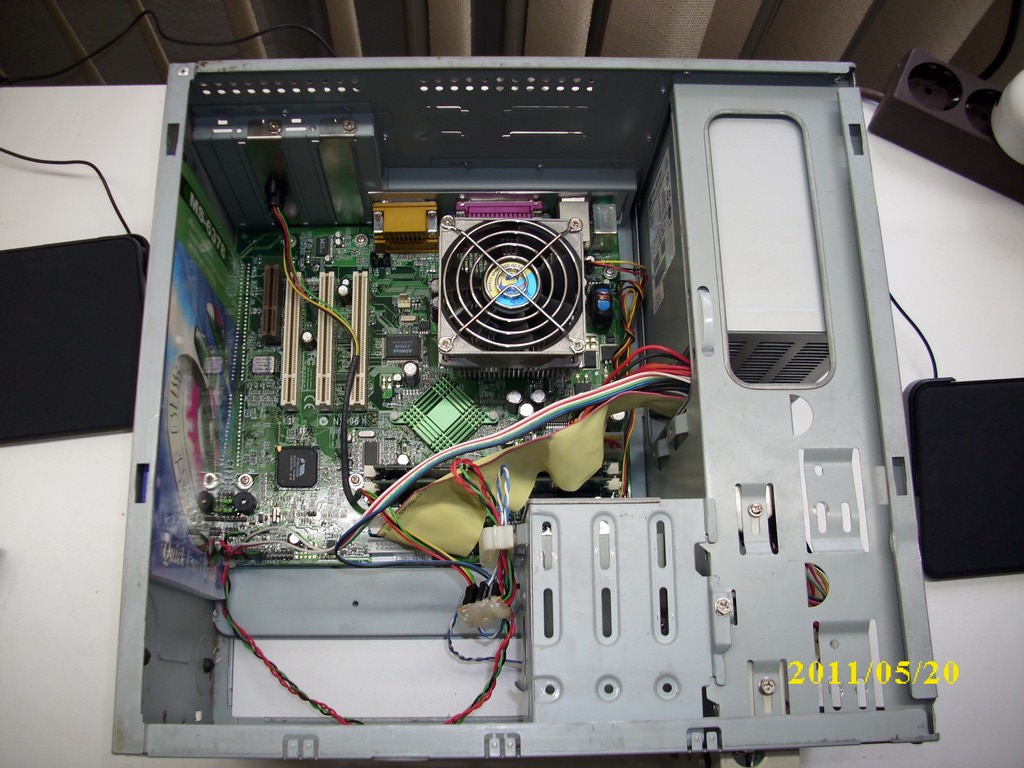
The system used is a passiv Pentium3 800Mhz with 128MB RAM. The menu/OS used is a micro linux booting AdvanceMenu/AdvanceMame of a 512 MB CompactFlash card. No moving parts inside and it even stores the scores. Yes, there are much more advanced frontends for arcades, but those need a Host OS. An additional host operating system results in more hardware resources and longer boot up times, which I don't want. Maybe a PowerMac runnung MorphOS, which should be much faster than AdvanceMenu.
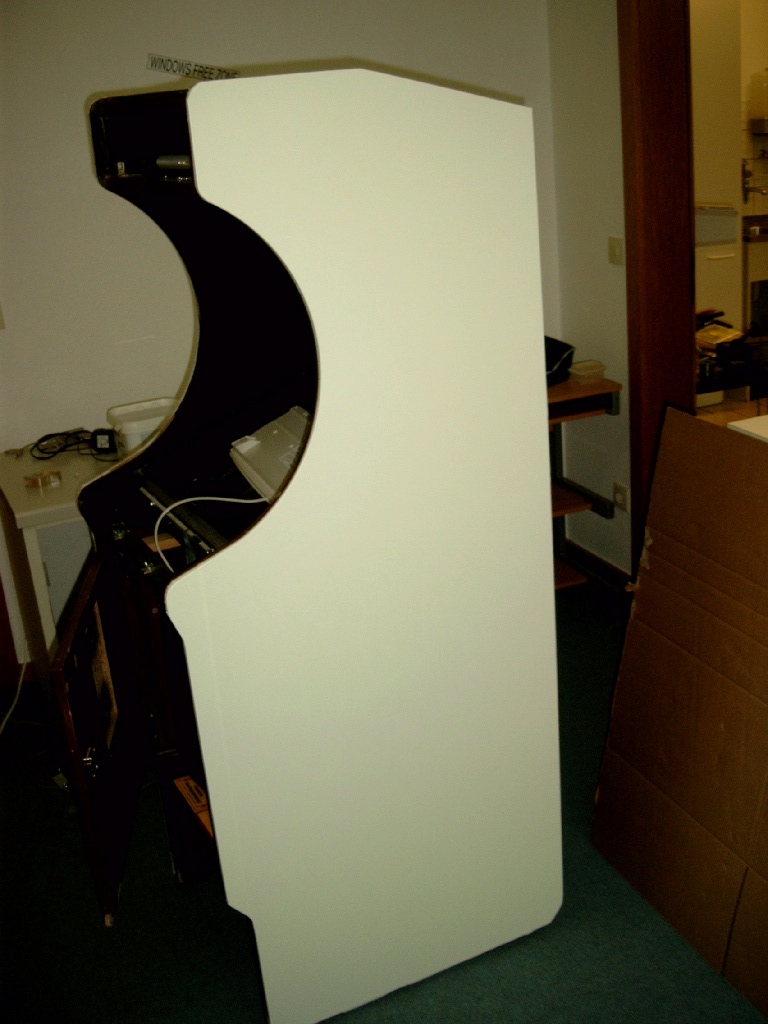
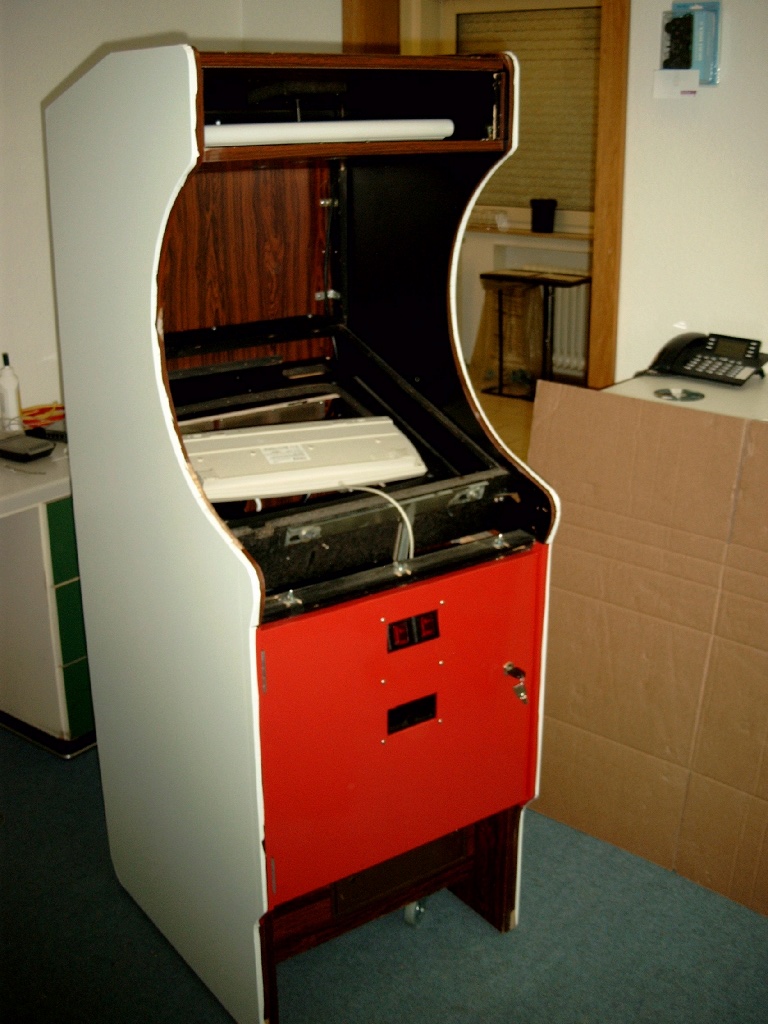
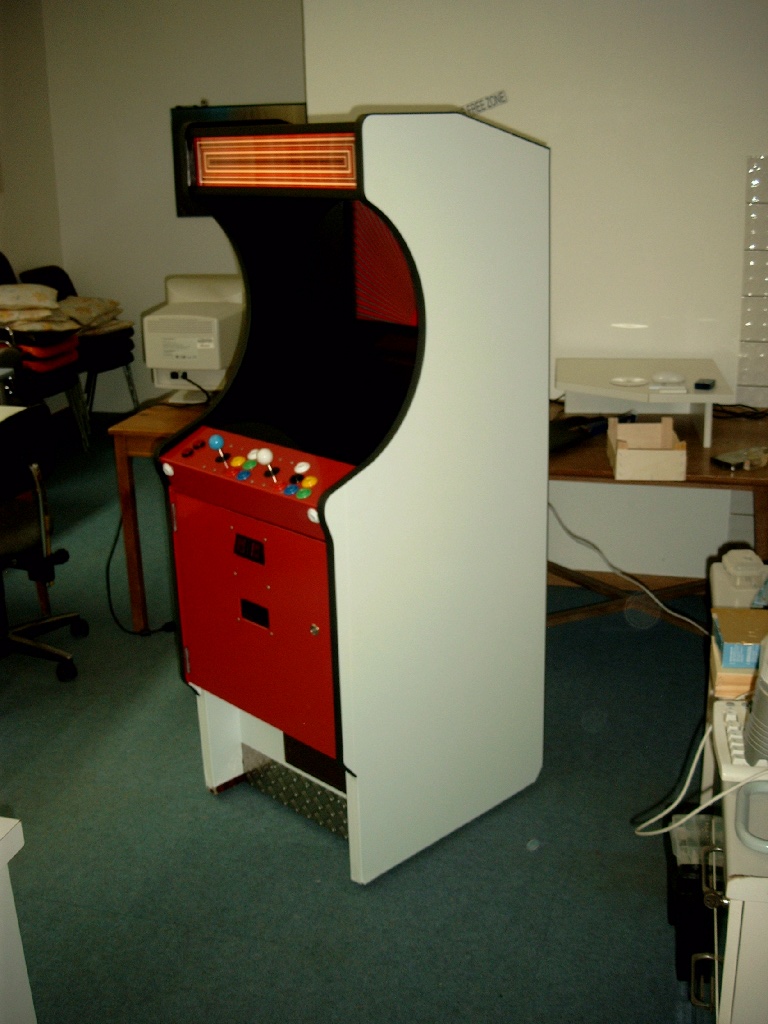
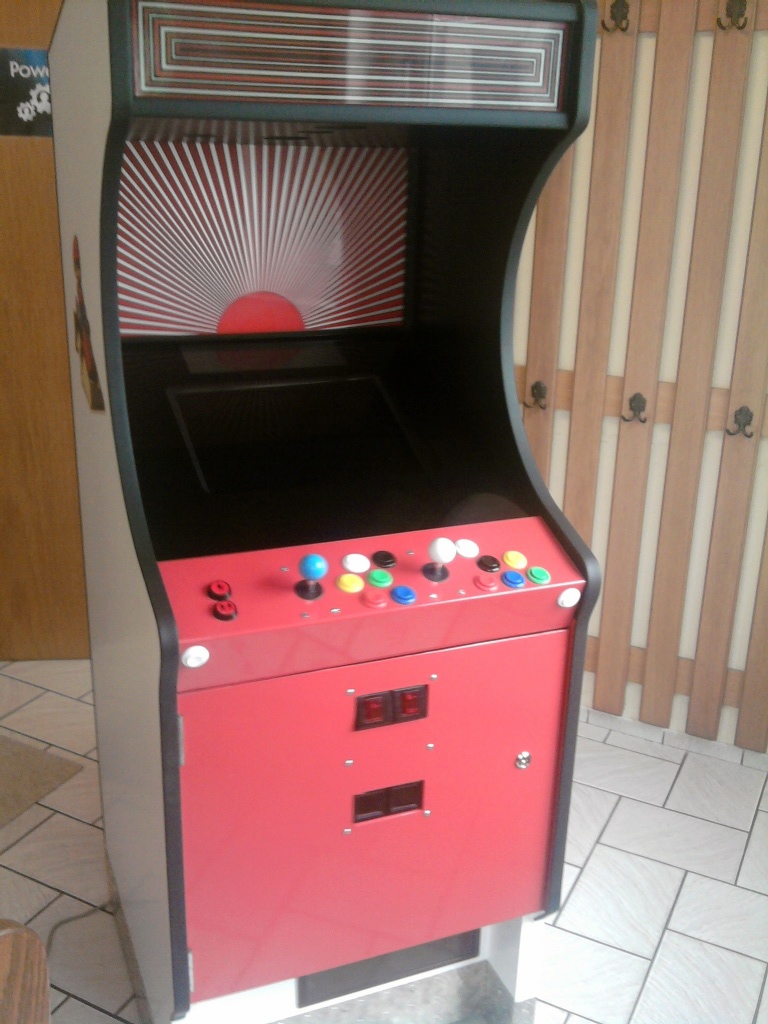
Now we get the monster some color. Well, the colors are red, white and black. On the first picture you can see the the white side. On the next images the front parts.
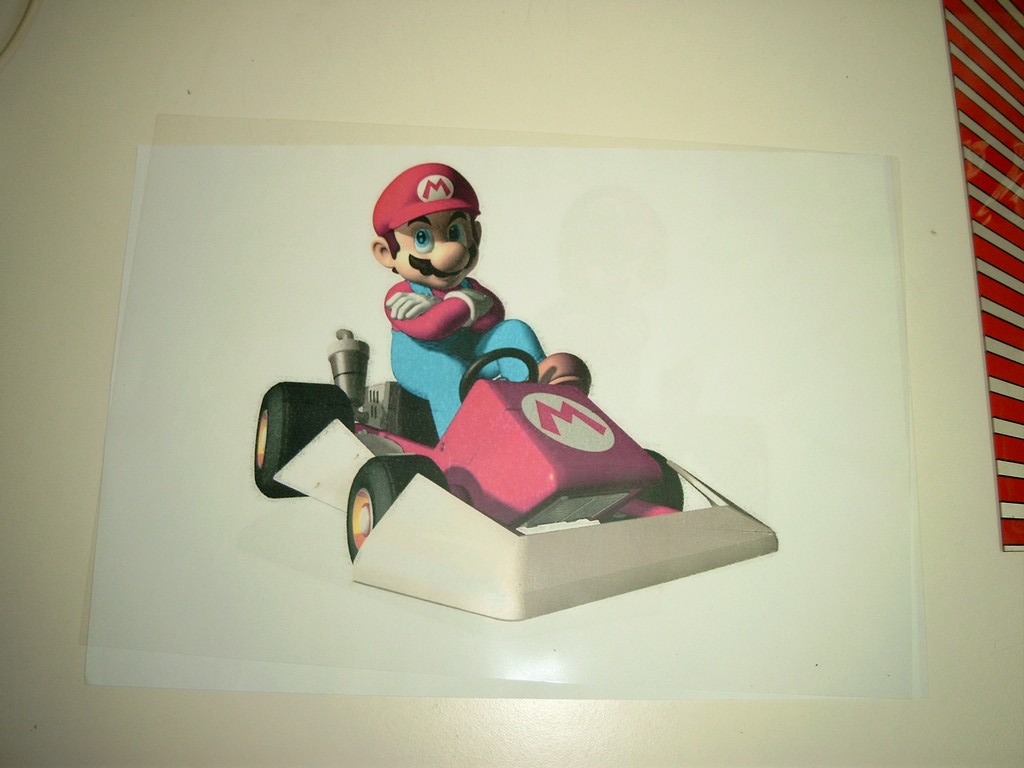
Yes, the edges between red and white look like hell. They will be covered by black edge protection later. On the white parts I will place game figures like the Mario in picture 4. This thingy will never be used as the print quality was to bad. I will need to check some other local print services.
The little bump on top could be removed with some massive work. That is where the bolt from inside gets screwed in. The screw is a little too long and someone used the full size to break the top. How ever. This part will stay authentic.
Display and panel are still missing. The current display is 15" and to small. It would be completely visible behind the cover glass. The edge protection needs to be mounted when the everything else is in place. That is the last step. It is possible that I need to cut the protection plastic a little to e.g. allow the top of the Marquee box to be opened.
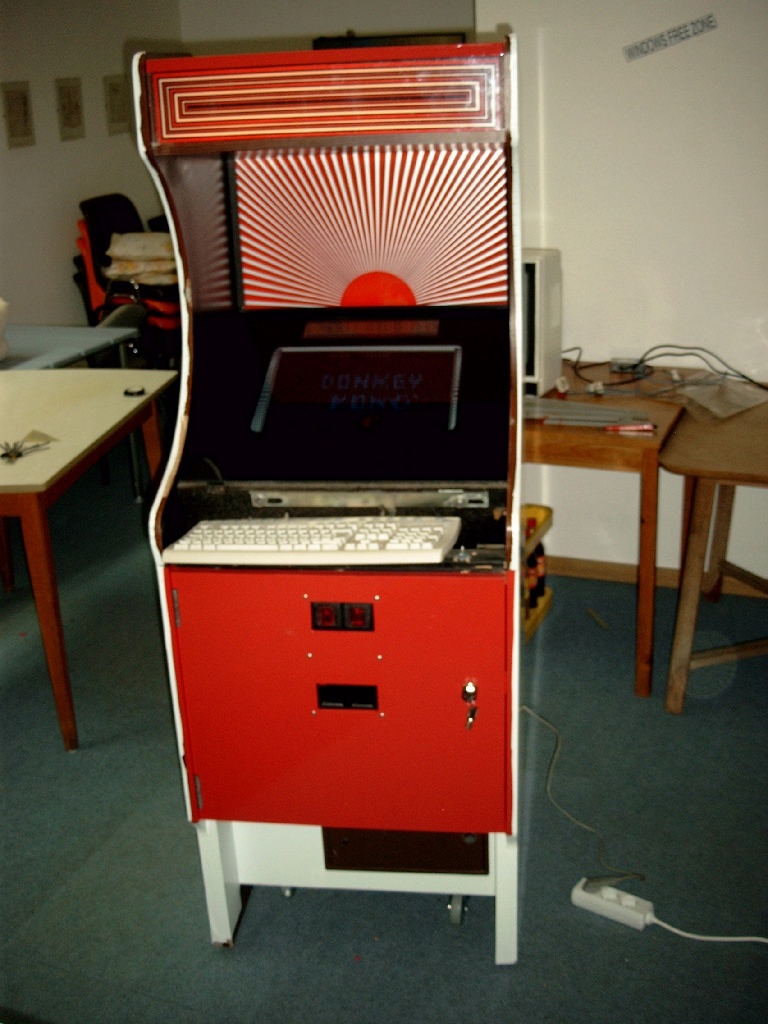
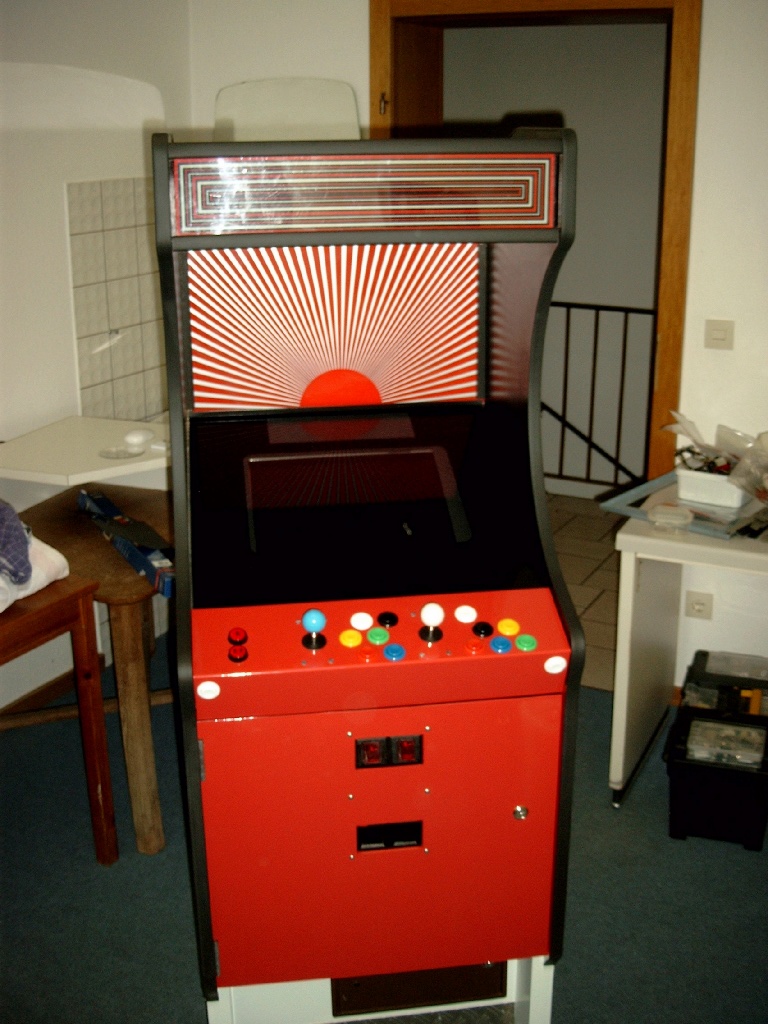
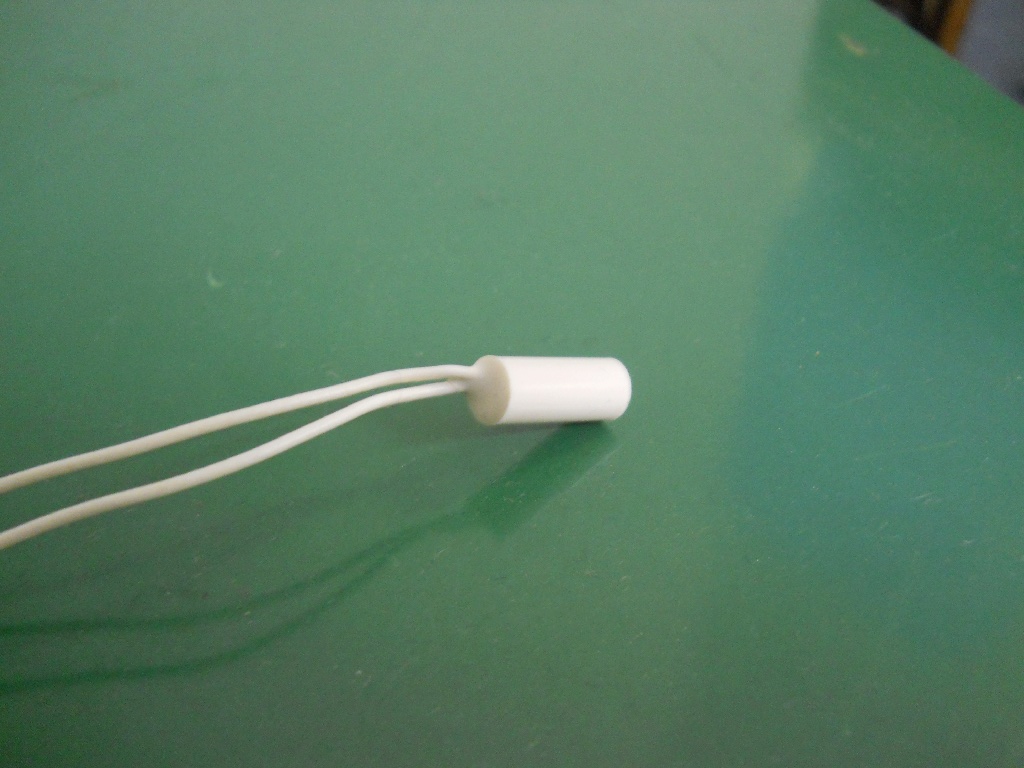
We are getting closer. The marquee is just the old one and will be replaced later. The new display arrived and it fits perfect into my self made display mount. Unfortunately there is a damaged pixel which is no big deal as I got the display for 36 Euro and the pixel is no way near the play field for most games anyway. All I needed was to adjust the height control of my display mount to make the display position perfect. I will cover the slightly visible display cover with black stuff later. A bigger problem is that this display goes into standby on power on. No chance on auto turn it on and the power switch is out of reach once the cover glass is in position. Even from inside you cannot reach it. My solution will be some reed contact which allows to control the display switch using a magnet. This also avoids to drill an additional hole for a power switch.
Still no panel, but more work on the software configuration which is so stupid. As you can see on the picture I put the first two bars of edge protection on. Now it really starts to look nice. As you can see on the top back, the back side is still missing. The back side needs to be read first. The metal is not mend to be there. It's the replacement for the old black plastic kick protection. It will clean the bottom of the arcade and protect the colored surface against bumps, kicks and dust. It will be place before the wheels, so you cannot see them anymore, once it is mounted. The metal for the sides need to be bended to fit around the edge of the arcade.
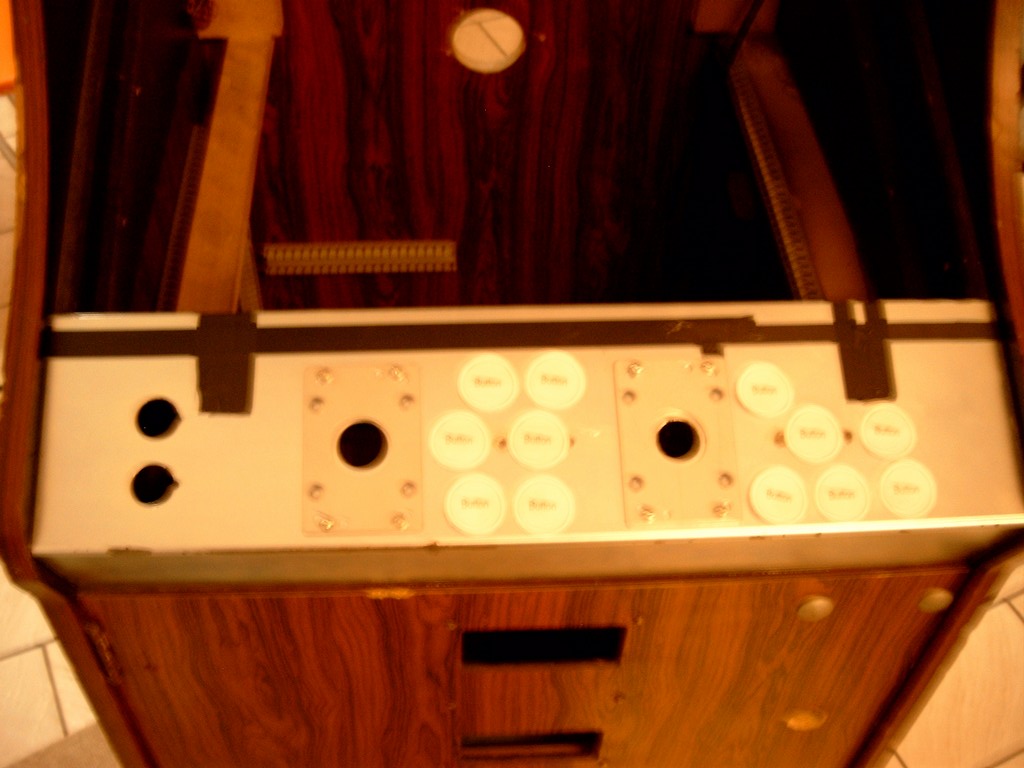
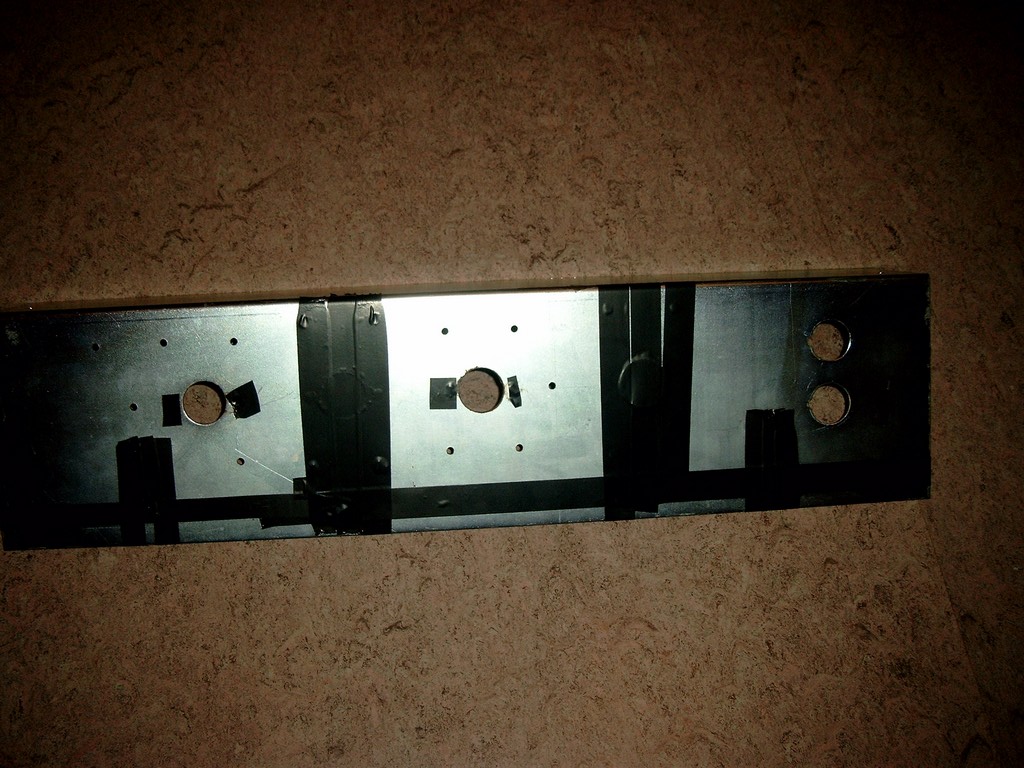
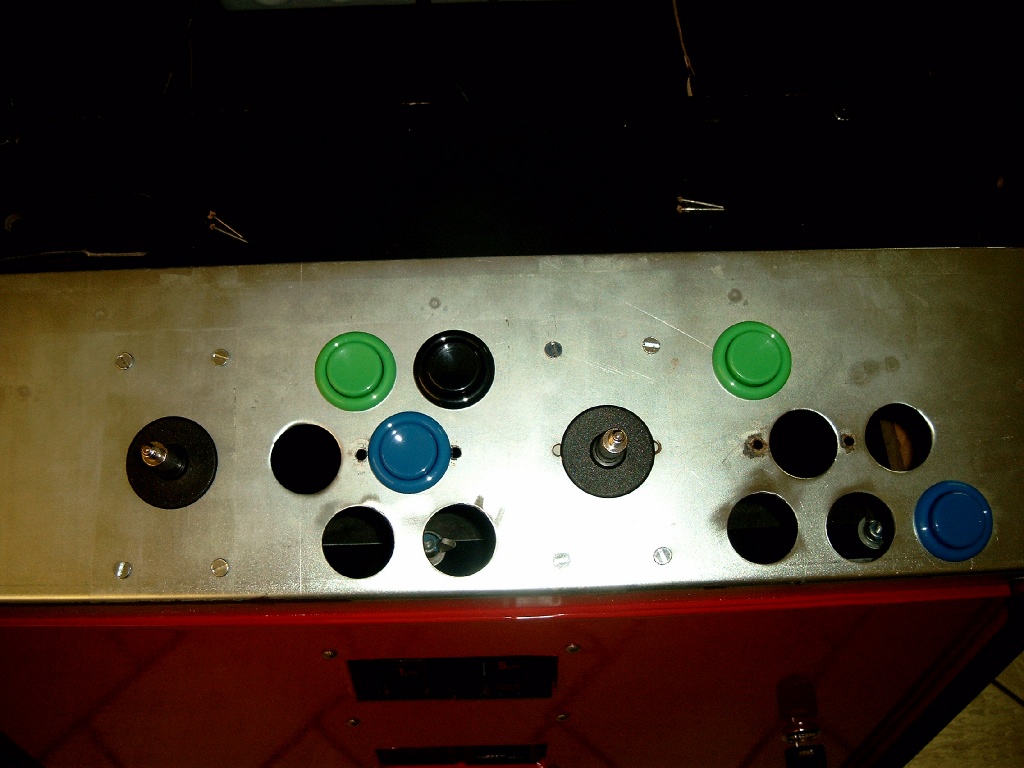
The panel is back and looks like a sieve, but all holes are right where they belong. Quick some button mounted, panel added to the arcade and it does not fit! Why did I know that?
While dealing with the button and joystick position I completely forgot about the opposite side of the lock mechanism in the arcade. So I needed to use the iron saw again and remove some parts not required for the mechanic. 5mm metal on about 13cm length needed to be removed. With a little luck and a push at the right point, even the joystick mount fits as it also got in the way of the lock.
As you can see there are six small holes. Those are left overs from the original spinner and button mount. They needed to be filled and then finally the panel is ready to be colorized.
The stuff you can see on the left and right side from the panel is duct tape I used to protect the edge protection against the sharp edges of the panel. I call it edge protection protection.
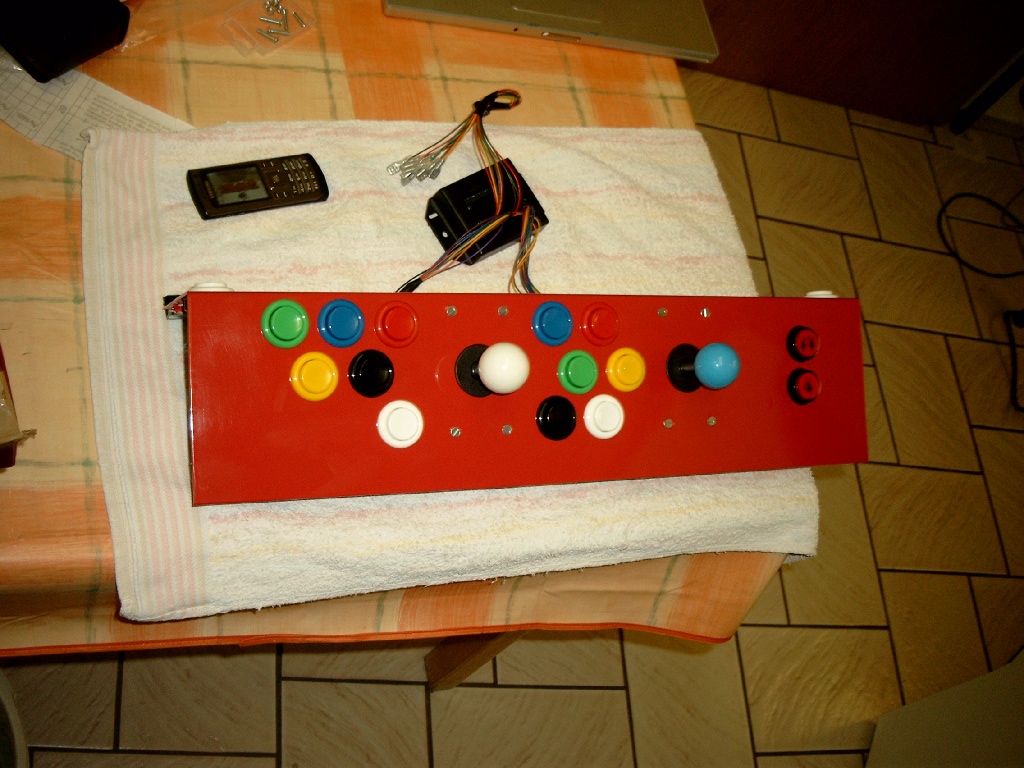
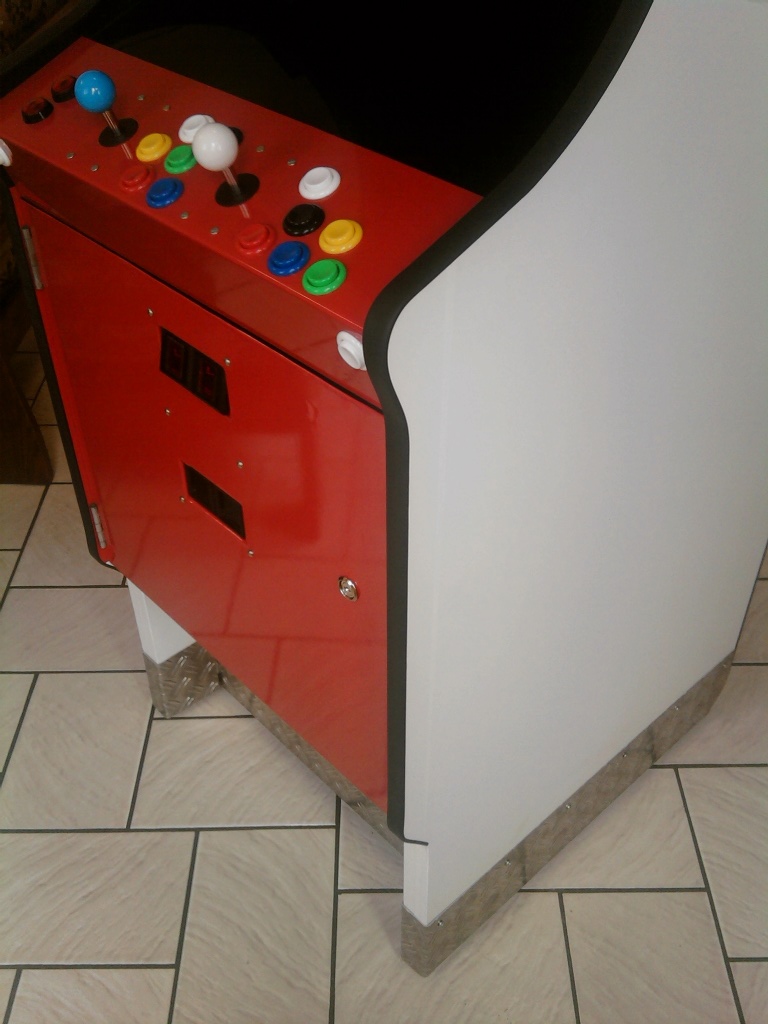
Now the panel got its final color and looks quite nice. The start buttons with the small figures on it are only temporary. At first I wanted to use them and then I reconsidered. The new buttons are not even ordered yet.
The first idea was to hide the screws of the joysticks, but I guess I keep them this way. In combination with the top door and the coin checker mount the fit perfect and make kind a style. Positive side effect: It will be easier to mount the joysticks.
As you can see I already wired the keys. The final test before mounting the panel in the arcade is still missing as I could not get the software to show a proper picture on the display. Not even the menu appears properly.

We are getting there. The first test run. The MiniPac wasn't even tested before. It works like expected.
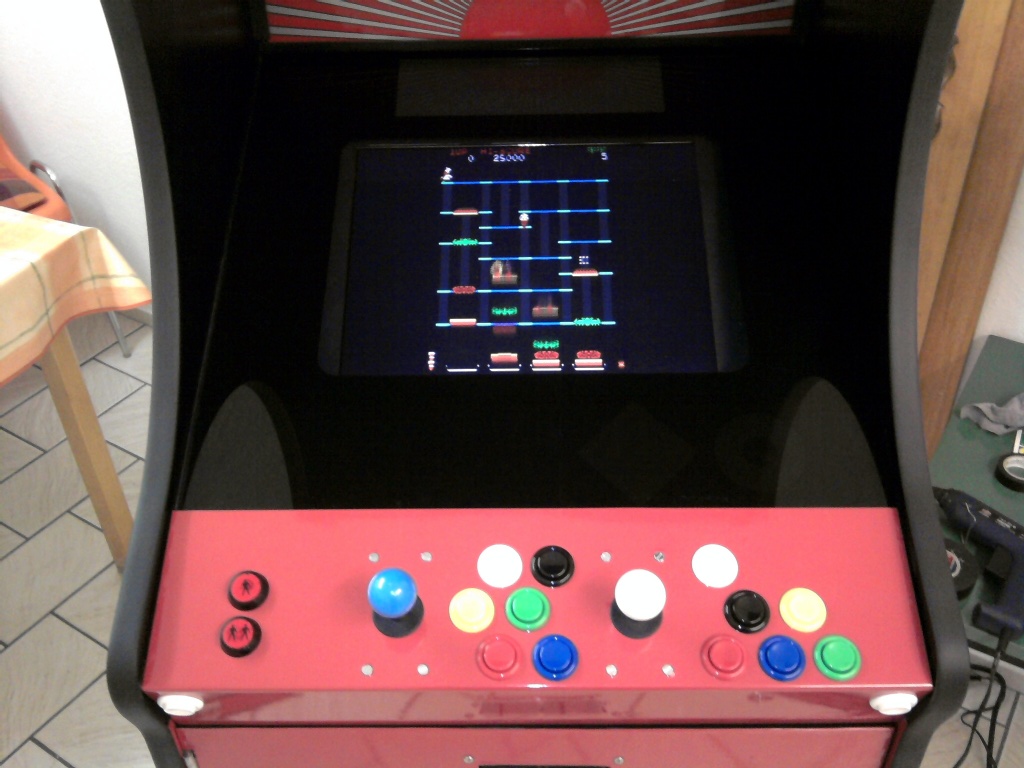
Added missing edge protection, display and panel are mounted and the kick protection is placed and ready to be kicked.
The display needs to be turned on by using a magnet. You can only play if you know where to activate the display. :)
The entire project is basically ready. Some things are still on the list. Kick protections for the sides, decoration and some other minor stuff is missing.
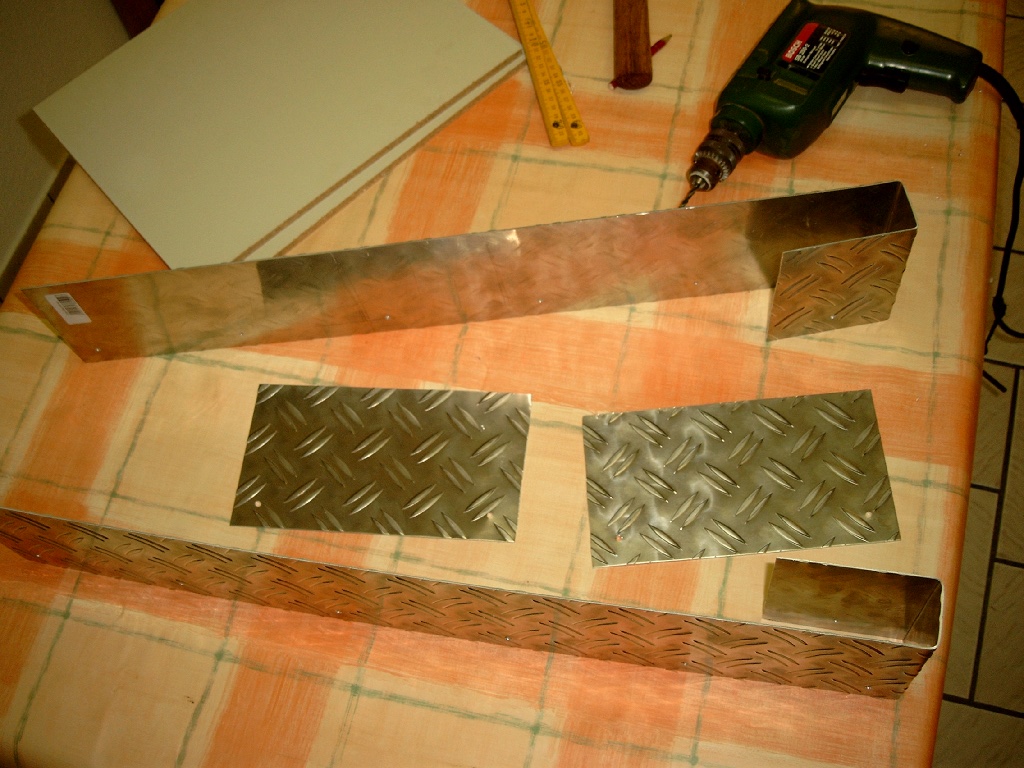
After the first usage at the Geit@Home #1 2010 and several hundred games, I got the kick protection. Again thanks to Axel Knabe
for the support. I drilled holes into the metal and curved the edges at the bottom back, so the arcade can be moved the old fashion way without scratching the ground.
This is the current state of the arcade from several angles. The side decoration is still temporary, so I did not a detailed shot of it. Same for the Marquee which needs to be printed, too.
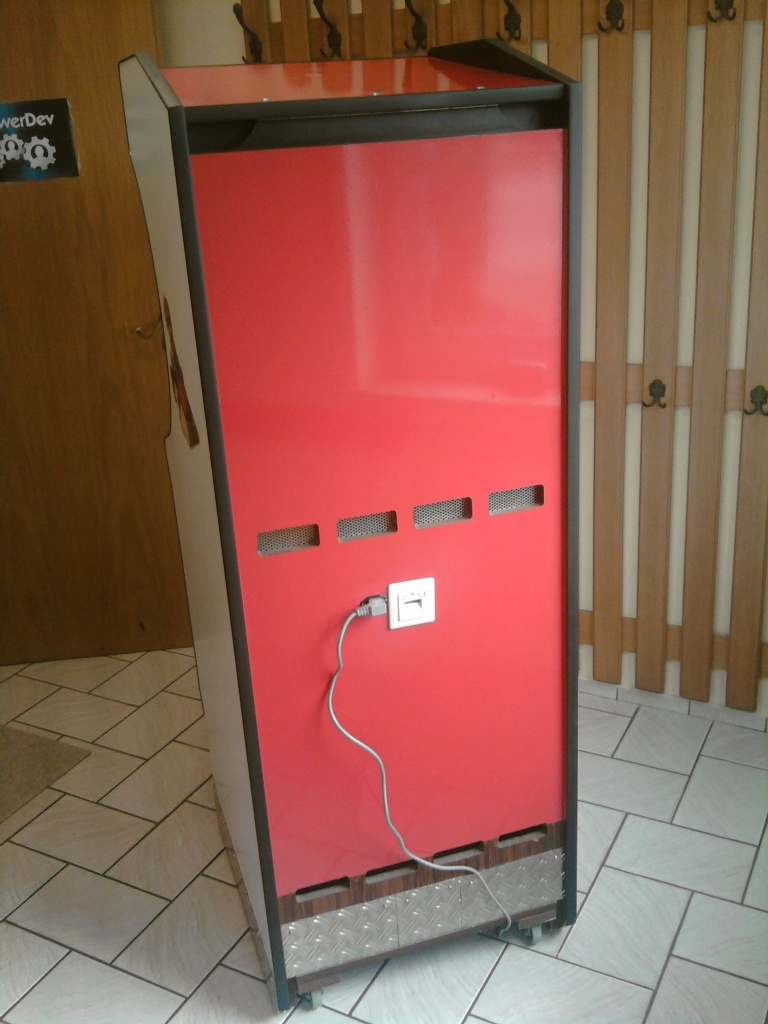
As some people requested pictures from the back: Here they are. I used the spare parts there, as you can see the old wood shine through and the kick protection is made of three parts.

Since about a year nothing was done to my arcade. Well, it's still a magnet on our hardware meetings, but technically and optically several things need to be done.
End of April 2011 I had some time for the little big fellow. First I searched for the spring within the left over parts. It's required to keep the panel locked and in position. I removed it for easy accessing the panel during construction phase. During the last year of intensive playing it got loose due the shaking and rumbling while gaming. It's not that easy to open it up, but in the current state the panel won't be open that much.
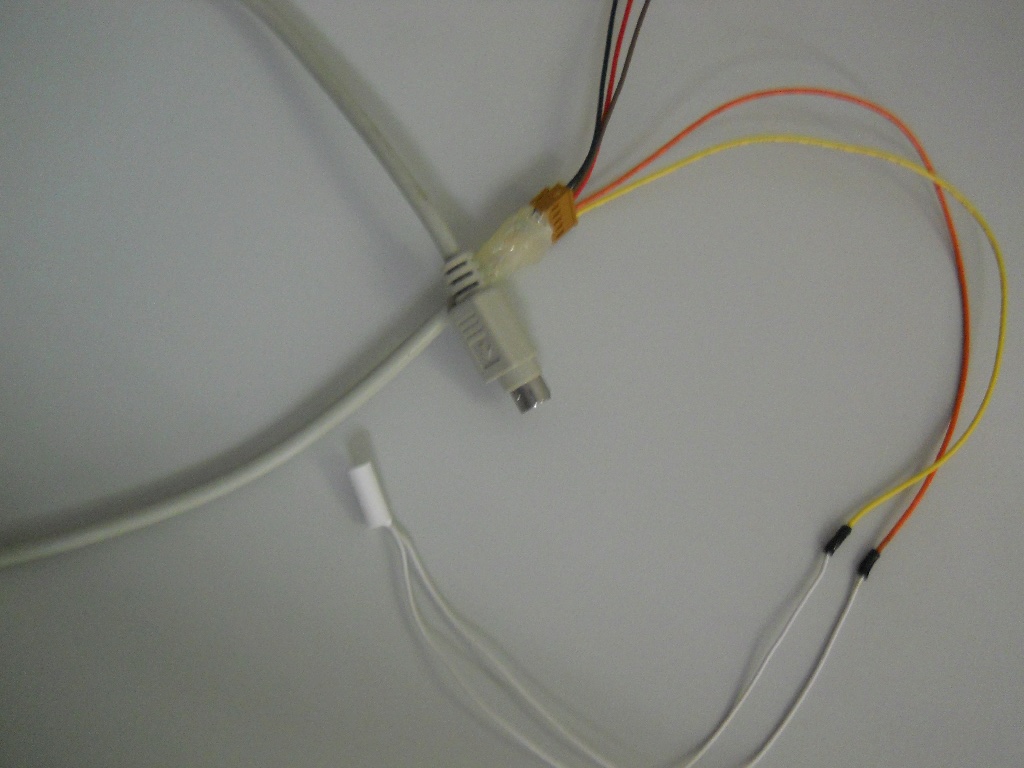
Since the panel was opened up I rewired the reed switch for the display. I added a connector in between, so the display can be removed again without soldering. Last year I skipped this part last year as there wasn't enough time.
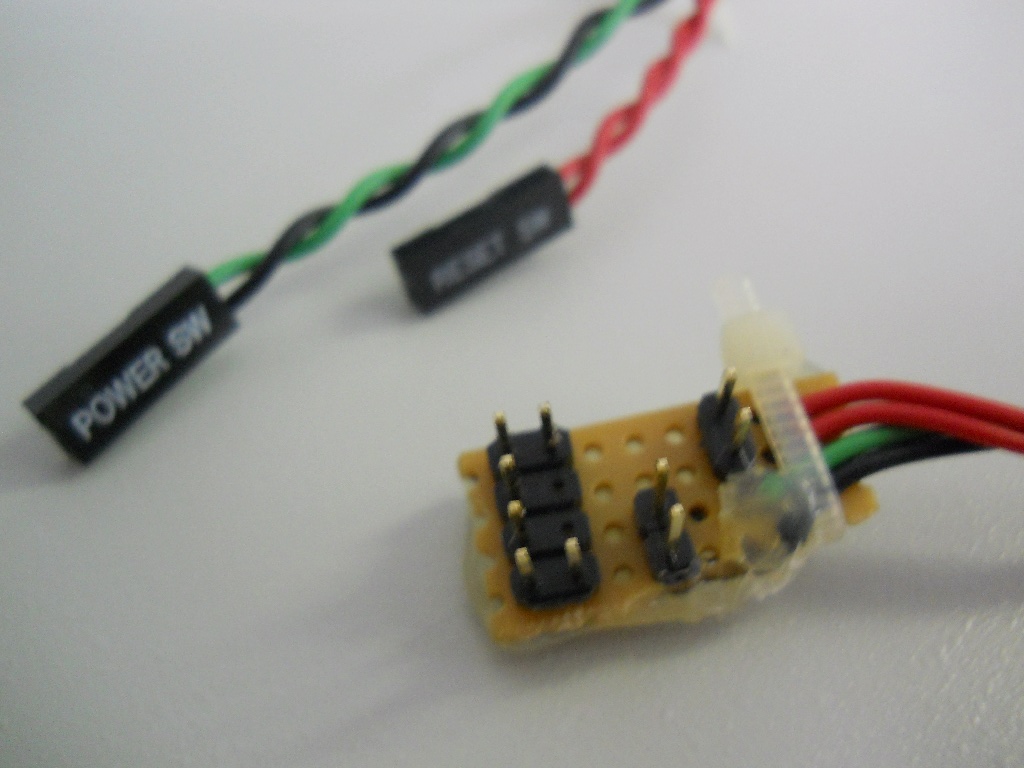
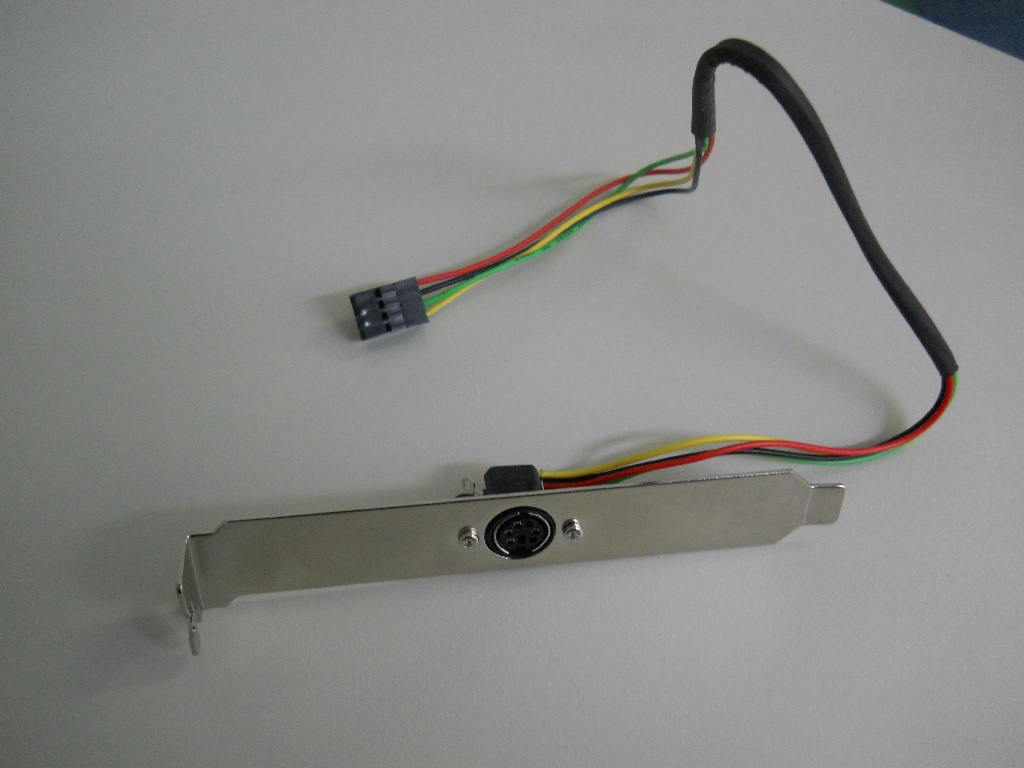
The second reed contact on the opposite side wasn't connected at all. I added a connector for easy removal and created a small interface connector for the pc. It allows to connect the pc case switches power and reset, as well as the arcade reed contacts to the main board of the pc. I cut some old PS/2 extender cable to connect the pc bracket with the arcade front.
I found an Athlon 1700 with 384 in the neighbours trash. It is perfect as replacement for the old Pentium 3.
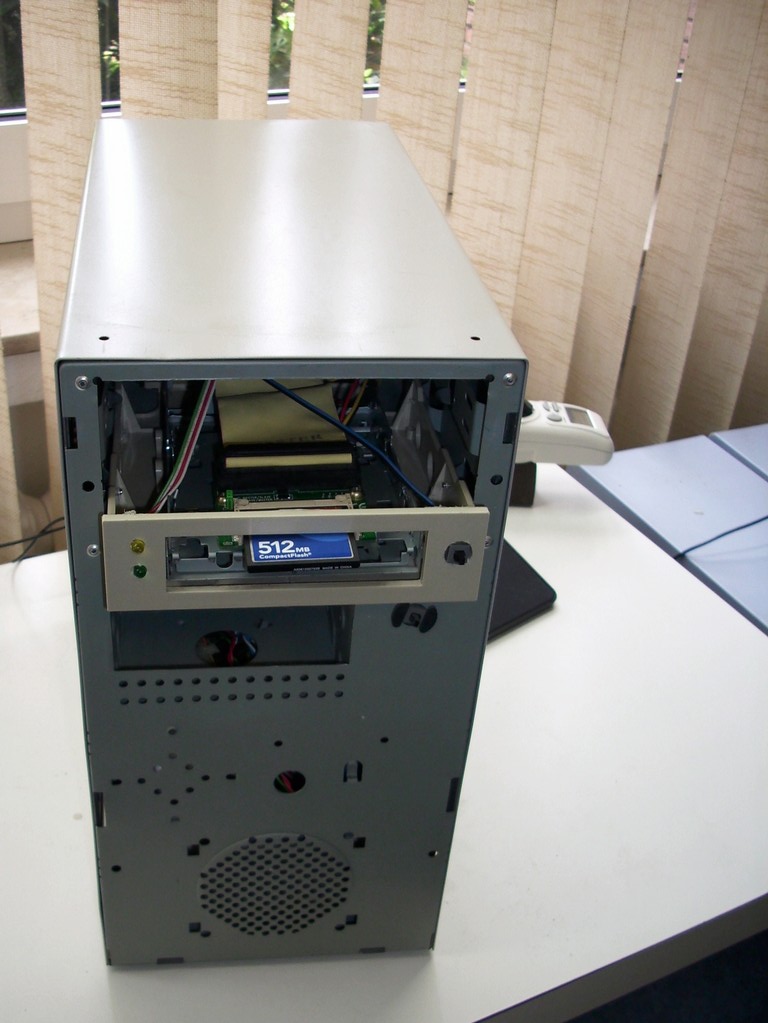
The old disk drive, which came with the system, got dismantled and I ripped off the metal base. I used a 5.25" frame to mount the metal inside and mount the CompactFlash card reader inside that base. In the result the card reader is perfectly framed and its easy to insert the card without bending any pins and damaging the connector.
Its not possible to use the 3.5" slot for this construct as the card reader plus the ide cable are higher than the slot itself. A hard drive and a cd drive aren't needed anyway, so who cares. The card slot is even easier to reach as its on the upper front now. I also added a power and a drive light and the missing reset switch. Those are only access able when the front door is opened and only handy for service operation. No need to deal with a magnet then.

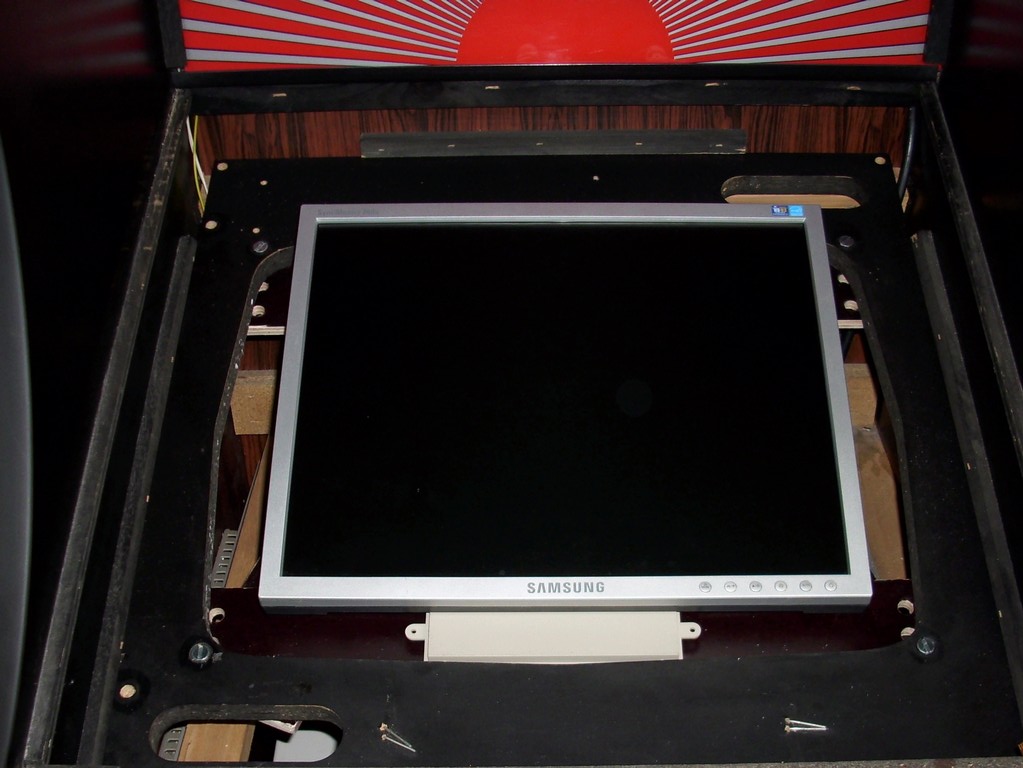
While I am on a cleanup mission, I replaced the old display by a new second hand one. The old monitor had extreme color fading when looking straight onto it, which was bad for people just watching. Also the old screen had problem in dealing with screen resolutions. The new display is less annoying here, too.
On the first picture you can see the first test set-up. I just needed to move the horizontal display mounts by using another pair of pre drilled holes. The small box you can see below the display is actually a 5.25" case bracket. I used two of them to create a little box. The display sits with its former stand mount on top of the box.
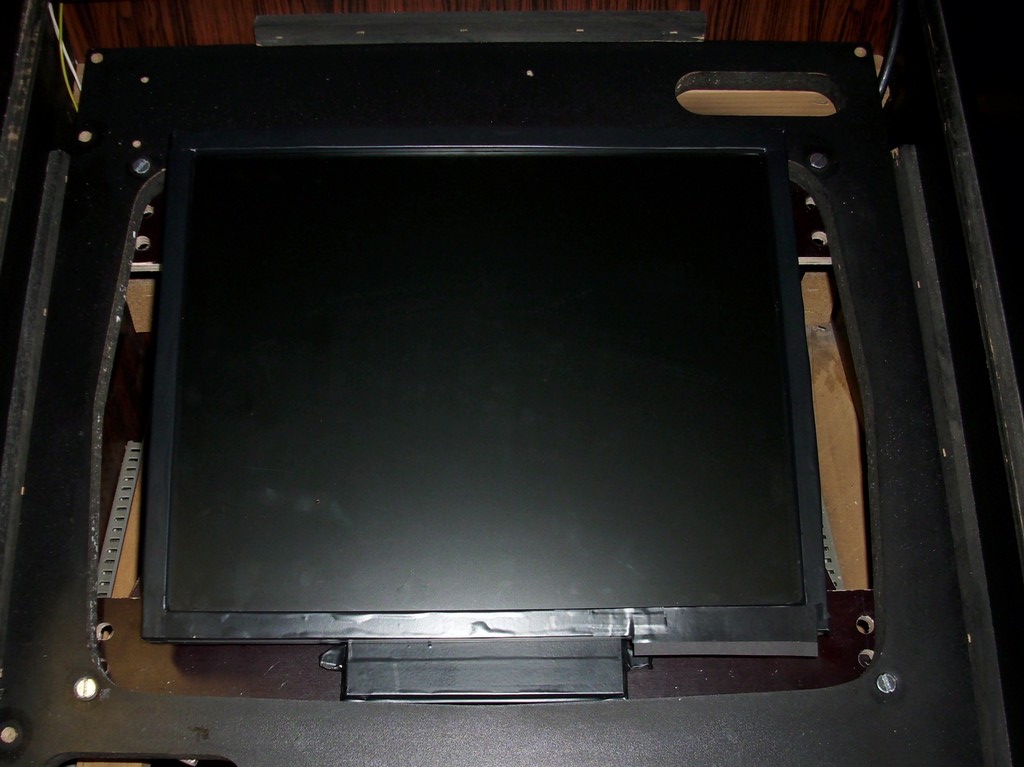
The second image shows the same set-up. This time I use black tape to cover the grey frame of the display and the box below. On the bottom right I used a black paper to cover the display buttons. When the glass cover is removed it's possible to flip it up and use the buttons. Now the case is no longer disturbing the game play.
The new player start buttons arrived. Thanks ArcadeShop. The old red buttons were left from the original arcade and looked quite bad compared to the shiny rest of the panel. I like authentic marks of usage, like on the glass and the marquee, but everything should look like it belongs there. And those ugly buttons did not. Unfortunately the big buttons cannot be moved to hide the misplaced hole in the panel. On the other side the old buttons were sitting in too big holes and one was able to see parts of the hole beneath the buttons. Well, switched one issue for another. Looks better anyway.
Since I am waiting for the art work, I invested some time to set-up the software. The entire stuff was running in default mode with just functional settings. Now I crested a little skin matching my arcade. Red colors with a little white. Just like the entire case is colored. Also integrated the new logo "Arcade Classics". I also made matching screenshots and recorded videos for each game. The menu is now presenting up to 15 seconds of pure game play. This is so cool. I changed to a new list view, but also the old 4x3 selection screen is available, where 12 videos are running at the same time! Awesome, even if the pc is getting on its limit. This may be a problem of the old 512MB CompactFlash card I used to store the system. Well, for the video footage I need a bigger card anyway.
I also reprogrammed the MiniPac a little. Now it's possible to flip page and letter wise though the game list by holding the Player 1 button while moving the stick. Makes it a hell easier to find the desired game.
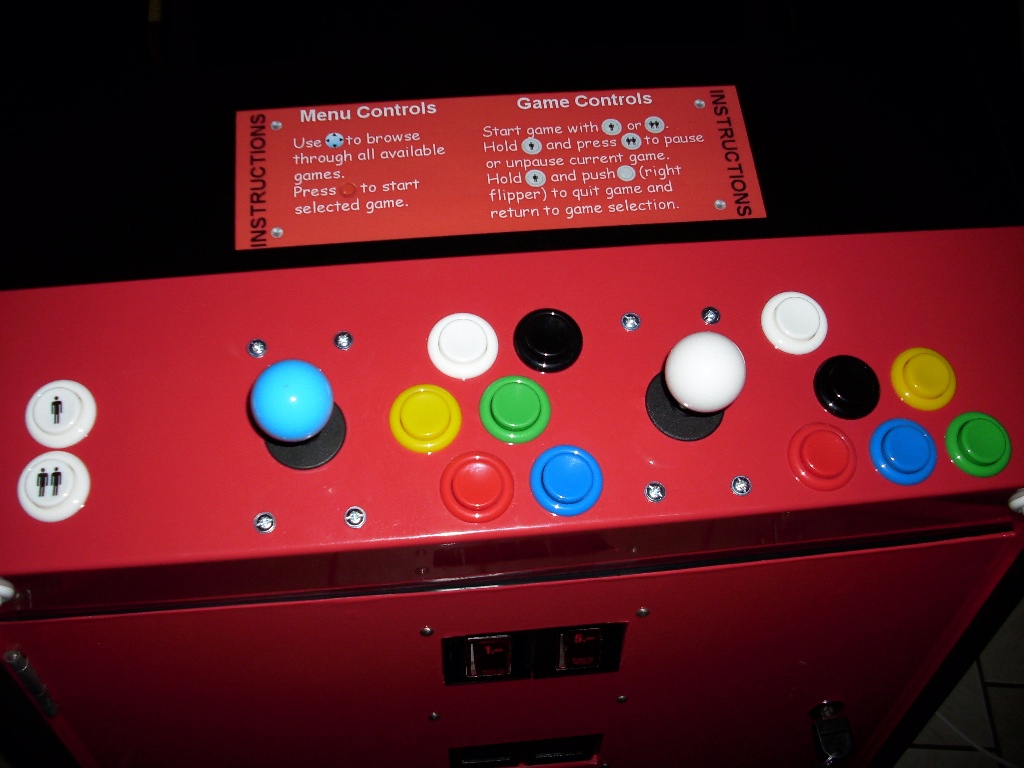
A new day with new tasks. The artwork arrived. In detail: I got the marquee and the instructions field which was covered black till now.

I used the opportunity to grab a cheap new 4GB high speed CompactFlash card from HAMA, which delivers up to 6 MB/s. Well, it should speed up the stuff compared to the shitty old 512MB card, but high speed is a big word for 6 MB/s.
Time for time detail work. I always wanted an usb port at the back to have the opportunity to connect a keyboard. Not only for mainentance as entering the bios, but also for doing fancy stuff with mame like recording videos and taking stills. When I ordered the player buttons I stumpled on the fancy connector, which I ordered straight away. Thanks to Axel Knabe
and his trainee for the support.
Then I replaced the ugly screws on the panel. First I wanted to use real bold like screws, but these are easier to install, as the panel back is quite bloated, and it looks quite nice this way, too.
On the third image you can see the latest and probably last acheavement for the arcade. Some nice chairs to sit on. There was even a table included, so they can be used for the outside barbeque as well.
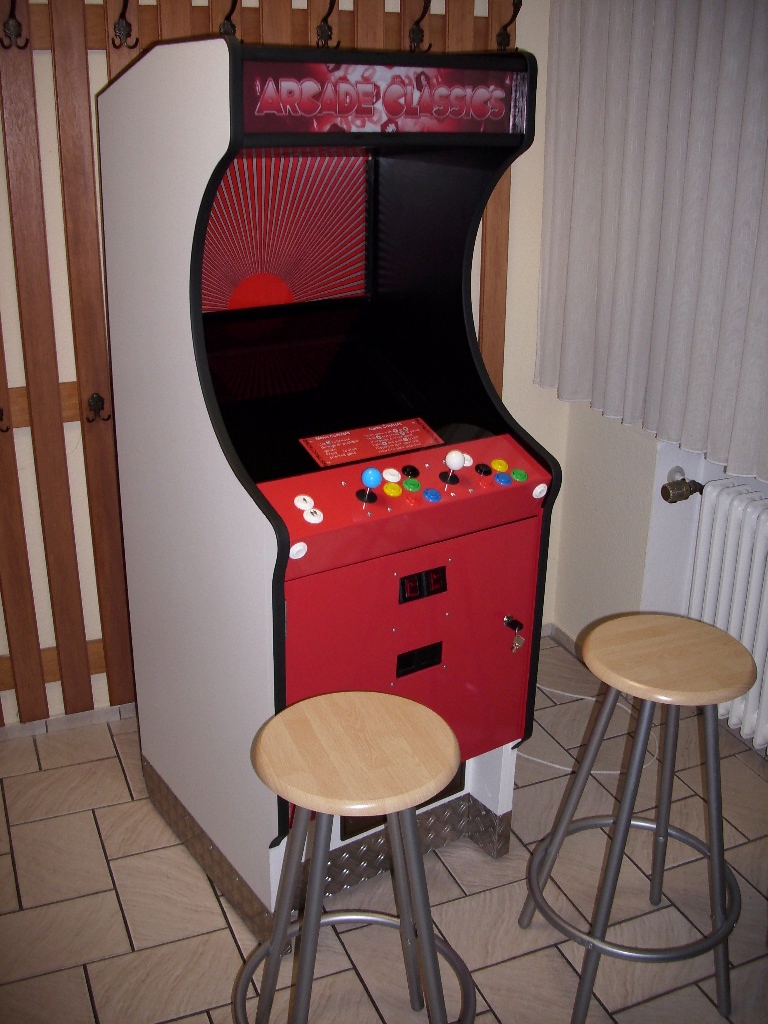
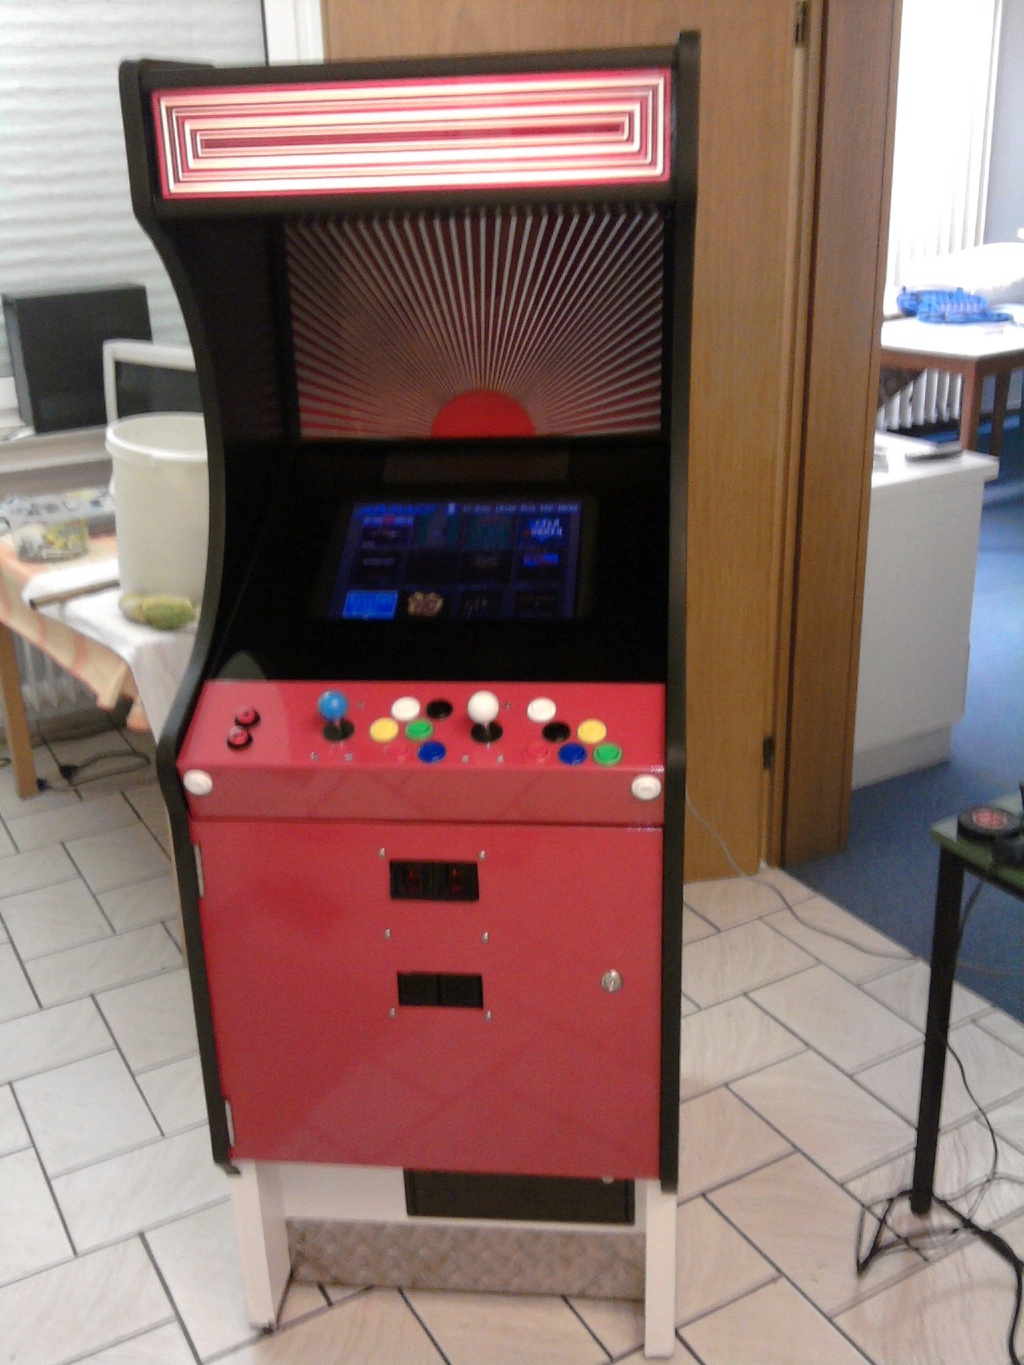
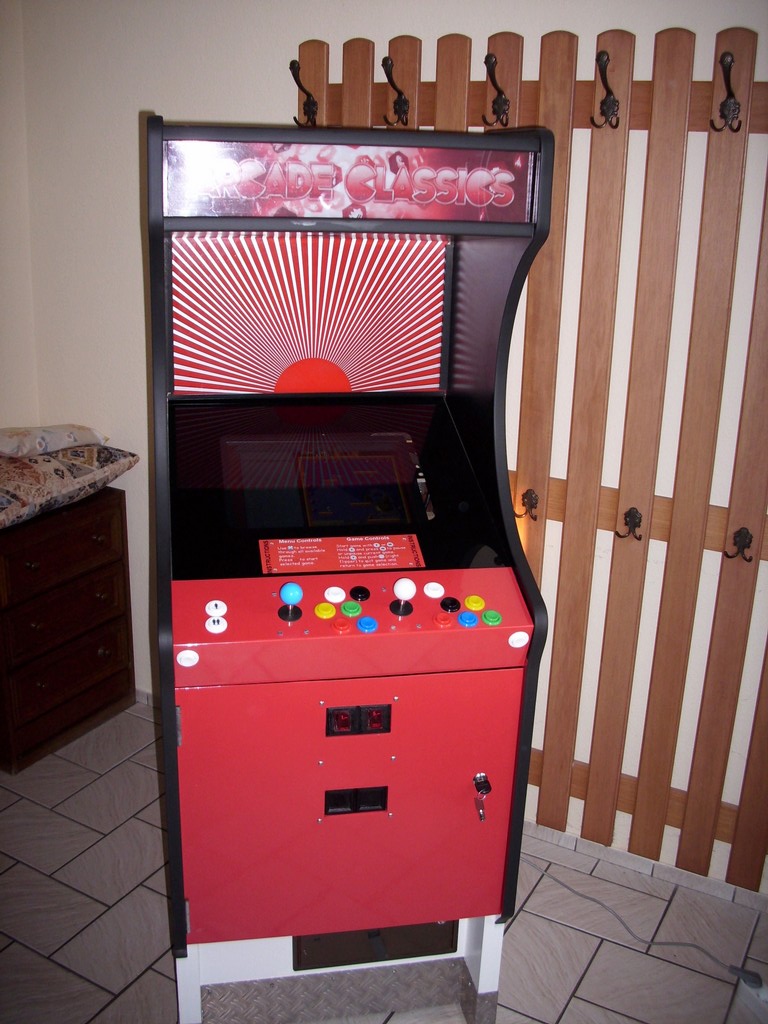
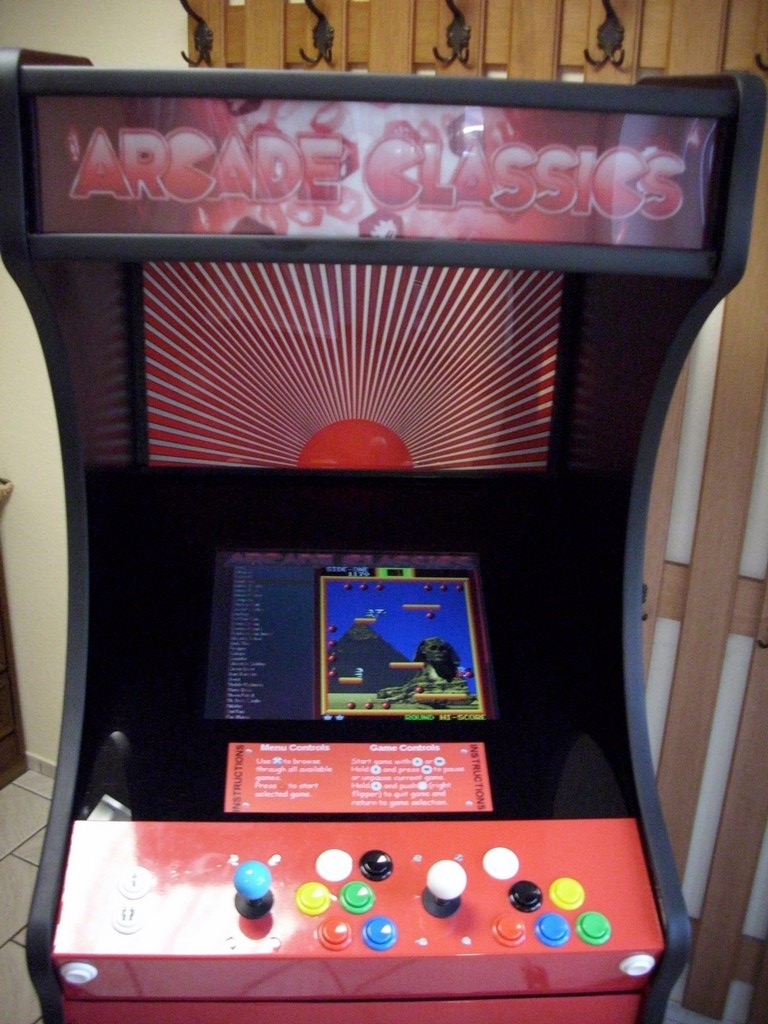
Ok, now. Here comes the finished arcade. I needed to disable the marquee light to get a proper picture, but it looks awesome when the back-light is on.
And finally two small (10MB/20MB) videos which show the thingy in action. I may need to remove the movies until the webspace gets expanded, so feel free to download now! :D